You’re probably aware that Facebook is the largest social platform by now, but just in case you aren’t, there are currently 2.7 billion monthly active users on Facebook. Facebook is sitting at the top of the social network food chain and holding about 28.5% of the entire world population. That’s a lot of people!
If you are a newcomer to Facebook marketing for real estate or just looking to make the most out of the resources offered to you through Facebook for real estate, this article will give you the rundown you need.
By the end of this article you will learn :
- The ins and outs of creating a professional facebook business page
- How you can use and implement facebook groups into your marketing strategy
- Learn how to create your facebook marketing strategy
Let’s dive in!
Creating Your Facebook Business Page

Having a business page is the equivalent of having a billboard to show off your business. The differences are that 1. your potential clients can interact with your brand and get to know you a little better before doing business with you 2. You can share your brand with the world rather than just your geographic area.
Within the next few subsections, you will learn:
- How to create your business page
- What content to post for the best results
- What not to post
- When the best times to post are
- How to get your first page likes
- How to create page CTA
- Where you can make excellent visuals for free
How To Create Your Facebook Business Page The Right Way
This guide on creating your business page from scratch accommodates the newest version of Facebook for desktop. Seeing that the platform continues to grow and change over time, we will do our best to keep this resource up to date.
Log In to your personal Facebook account.

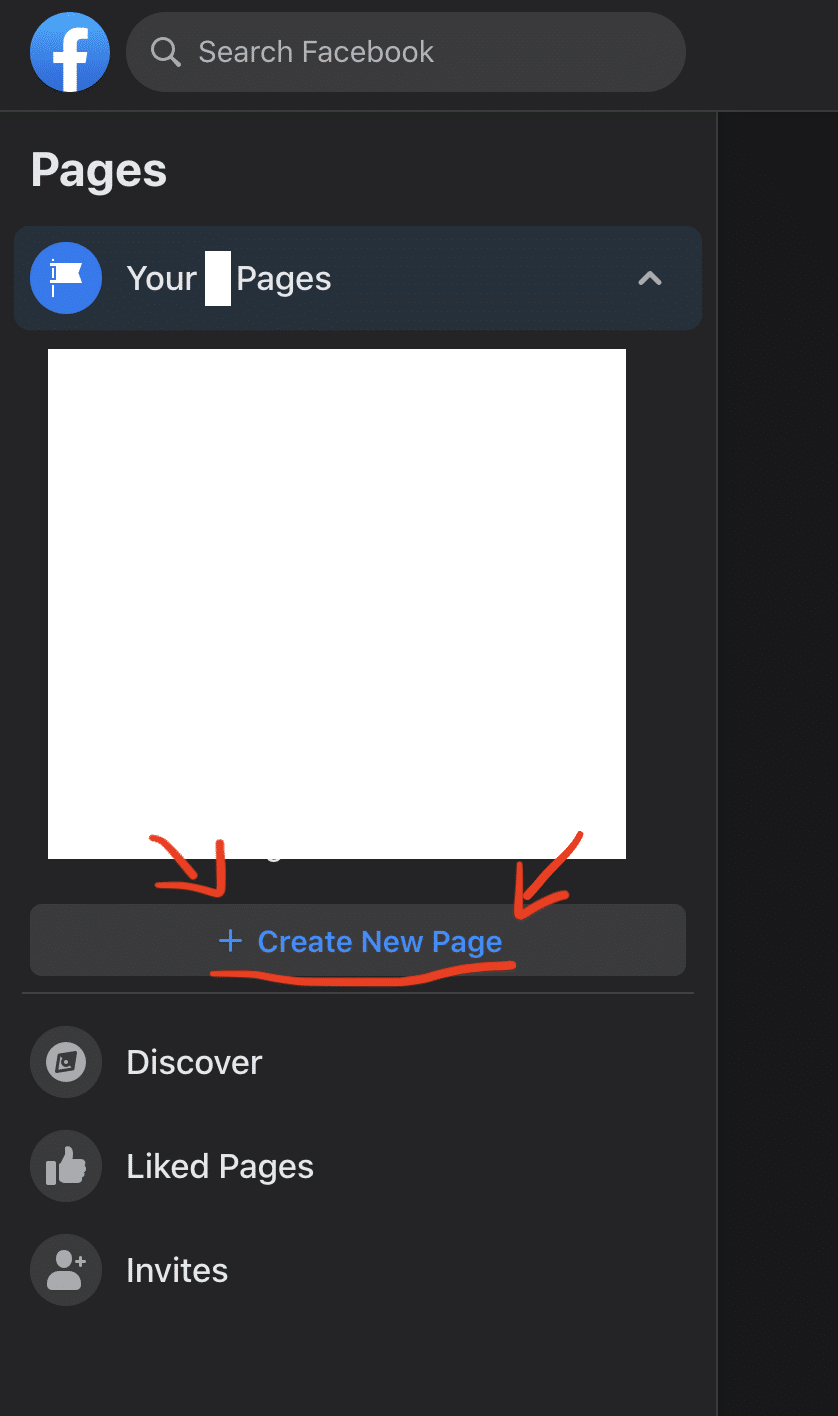
Look on the left-hand side of the page, and you will find a button about midway down the page labeled “+ Create New Page” click this button.
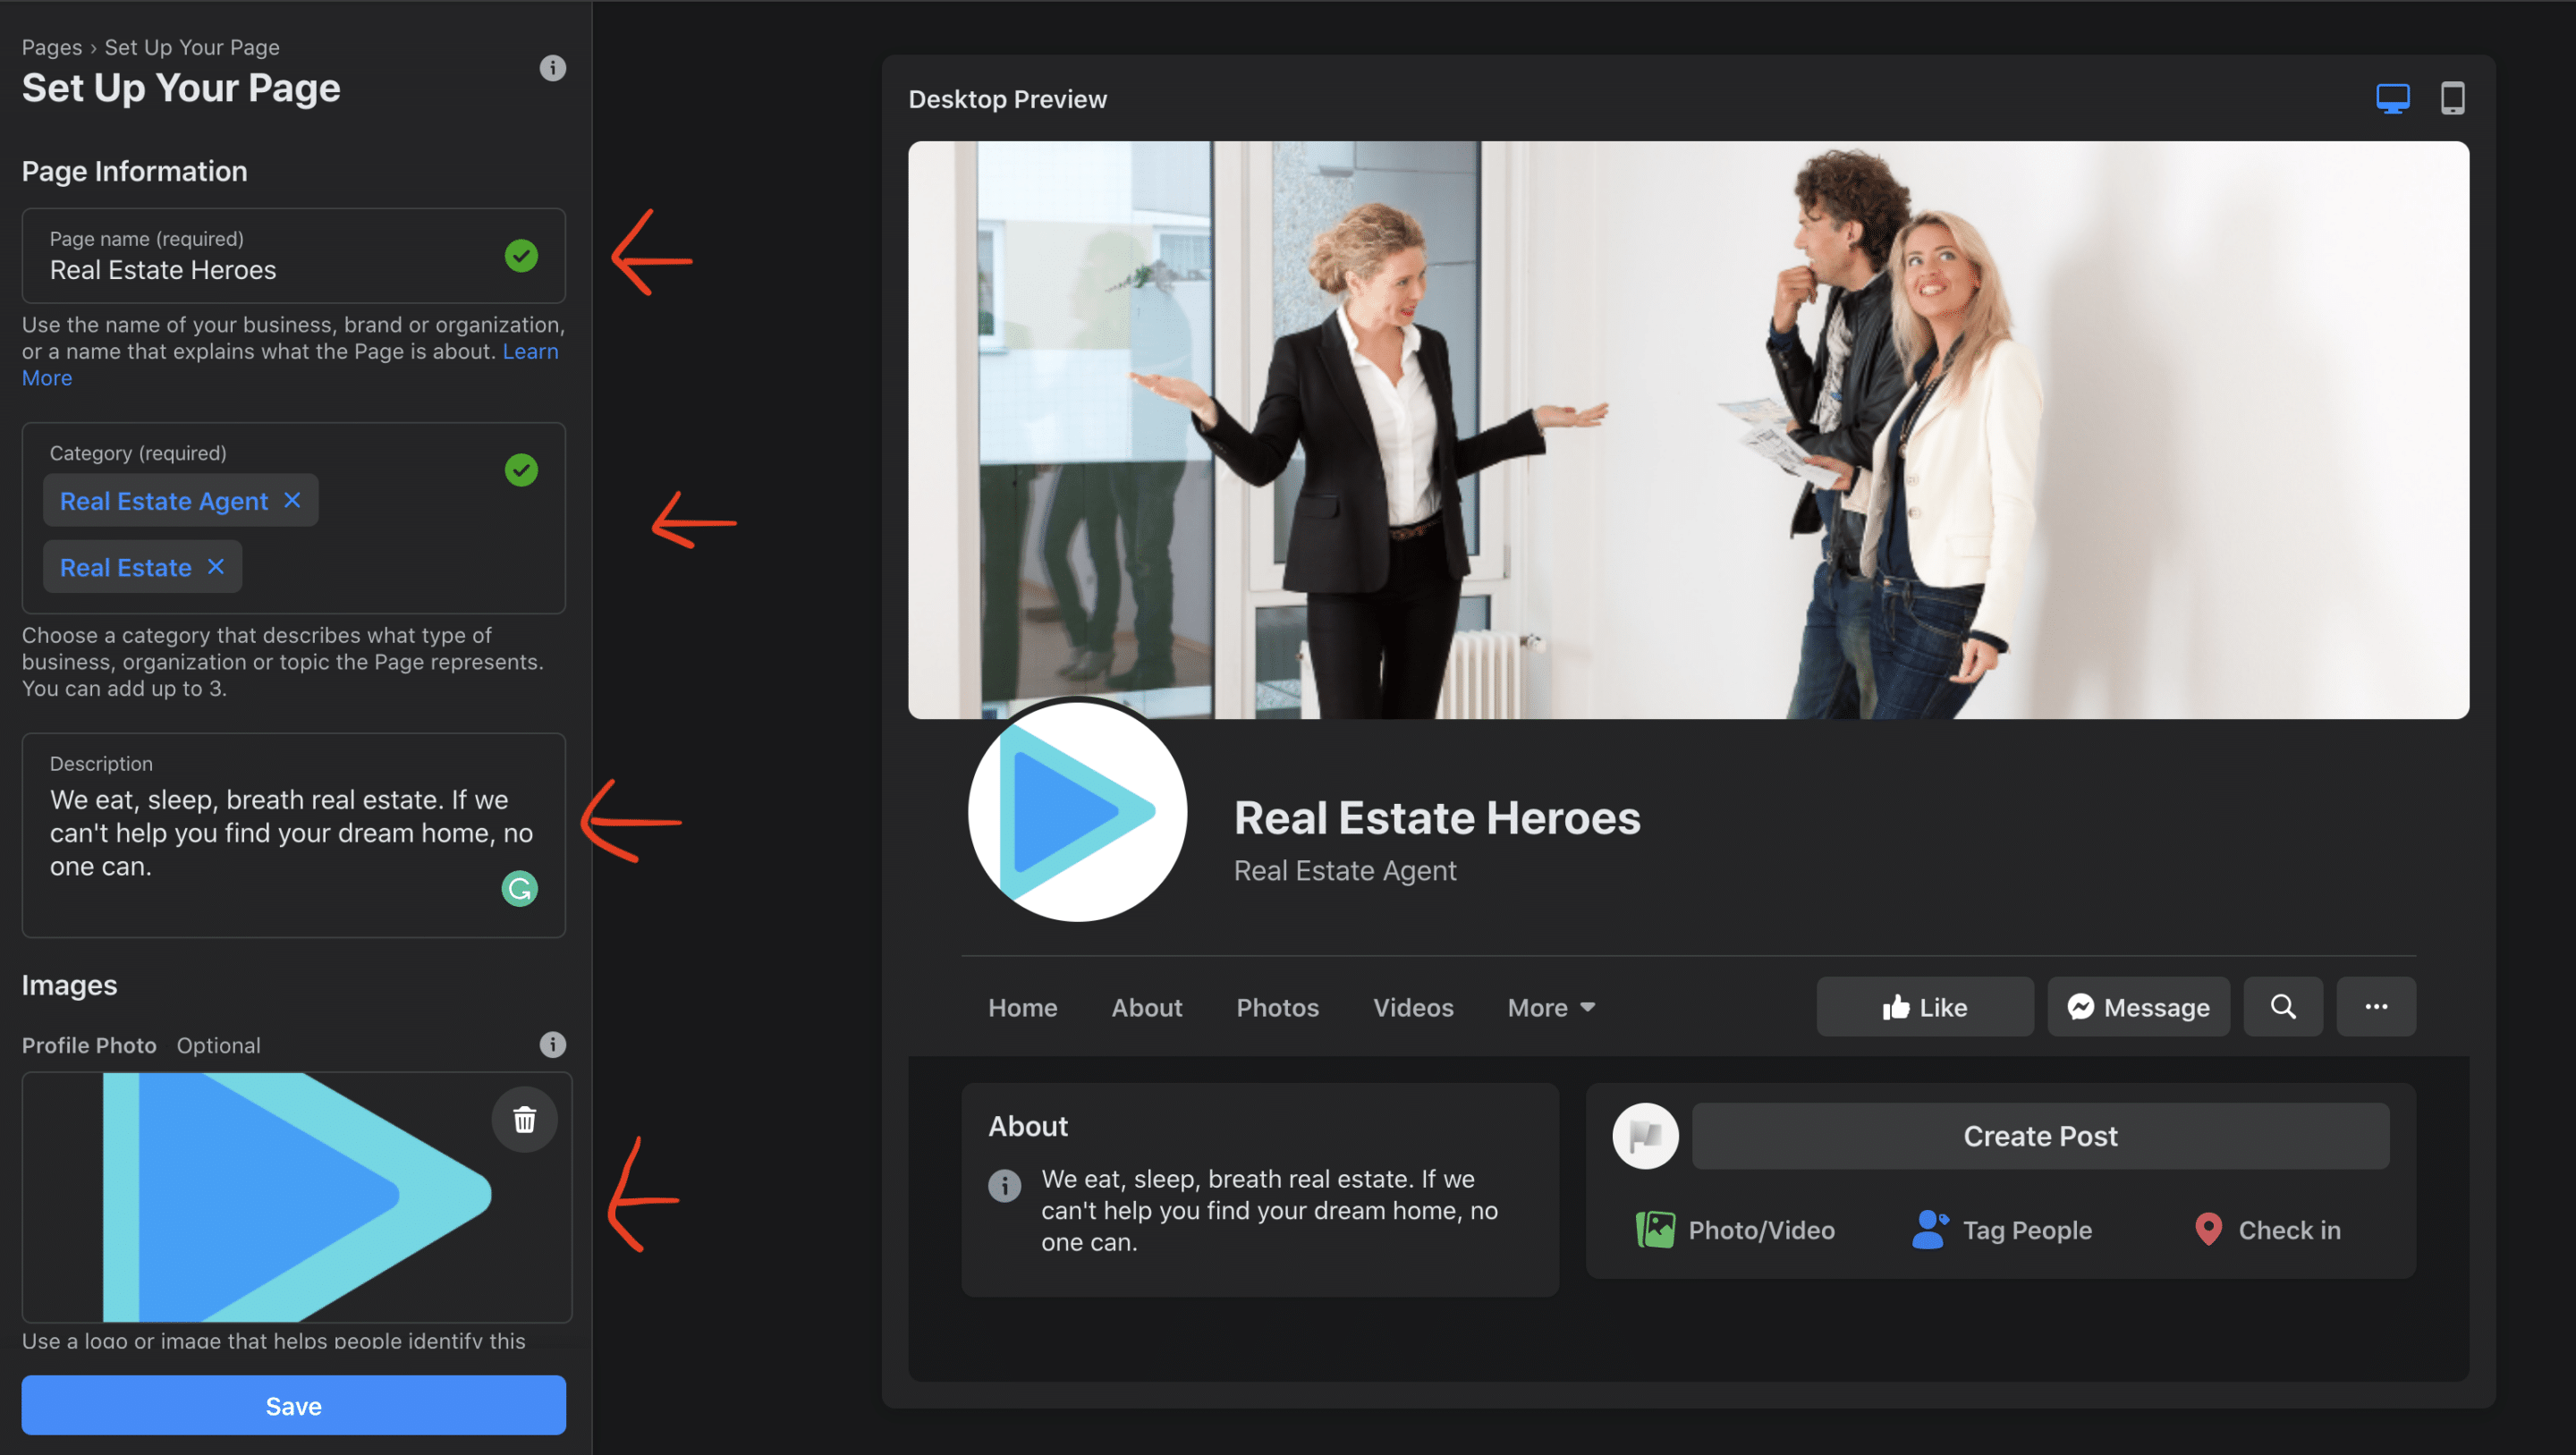
You will be required to type the page name you would like, the category of the page you are creating(you can select up to three, but make sure they all align with what you do), and a brief description of what you do and what the page will be about. Then click save.
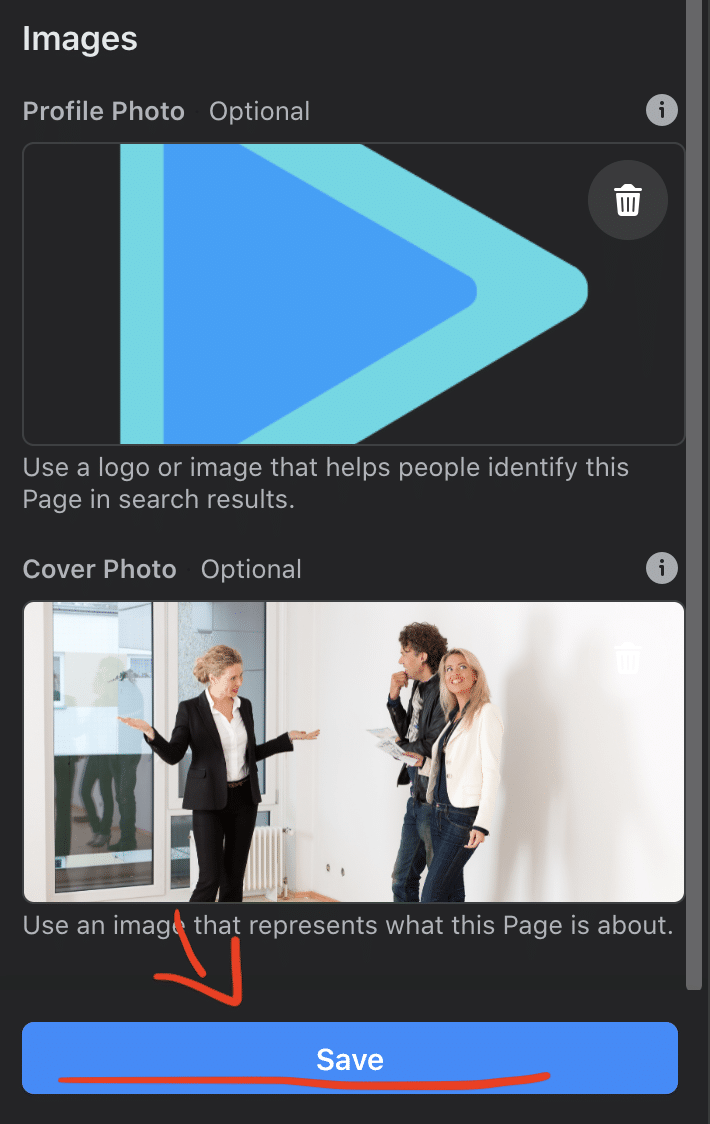
When you click on the “Save” button, two new sections will appear. One for a profile picture, and another for your cover photo. (If you don’t have pictures for these sections yet, don’t worry about it now and just hit save again. We will come back around to it in the area about creating excellent visuals for free)
Your page is now officially created, its time to fill in some vital information.
Look towards the menu located on the left side of the screen. Click on the “Edit Page Info” option listed towards the bottom of the menu.
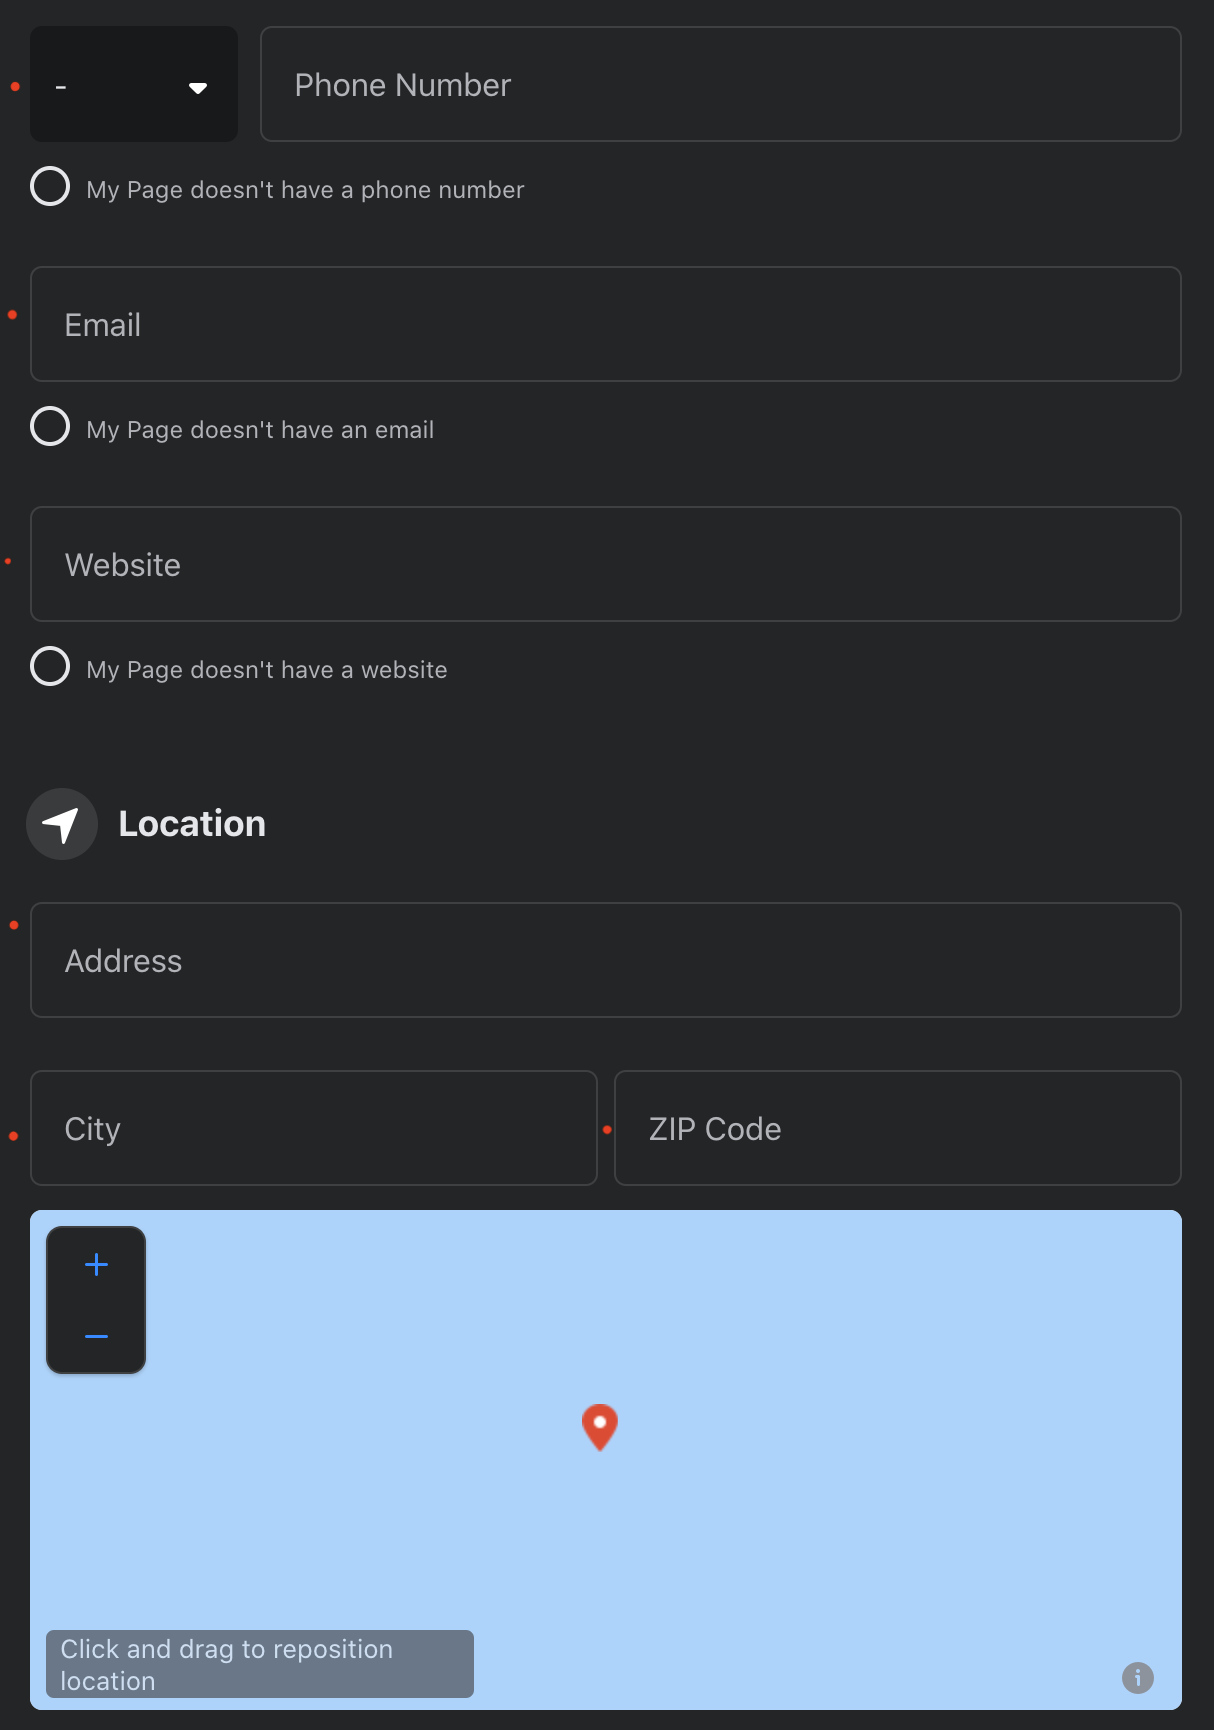
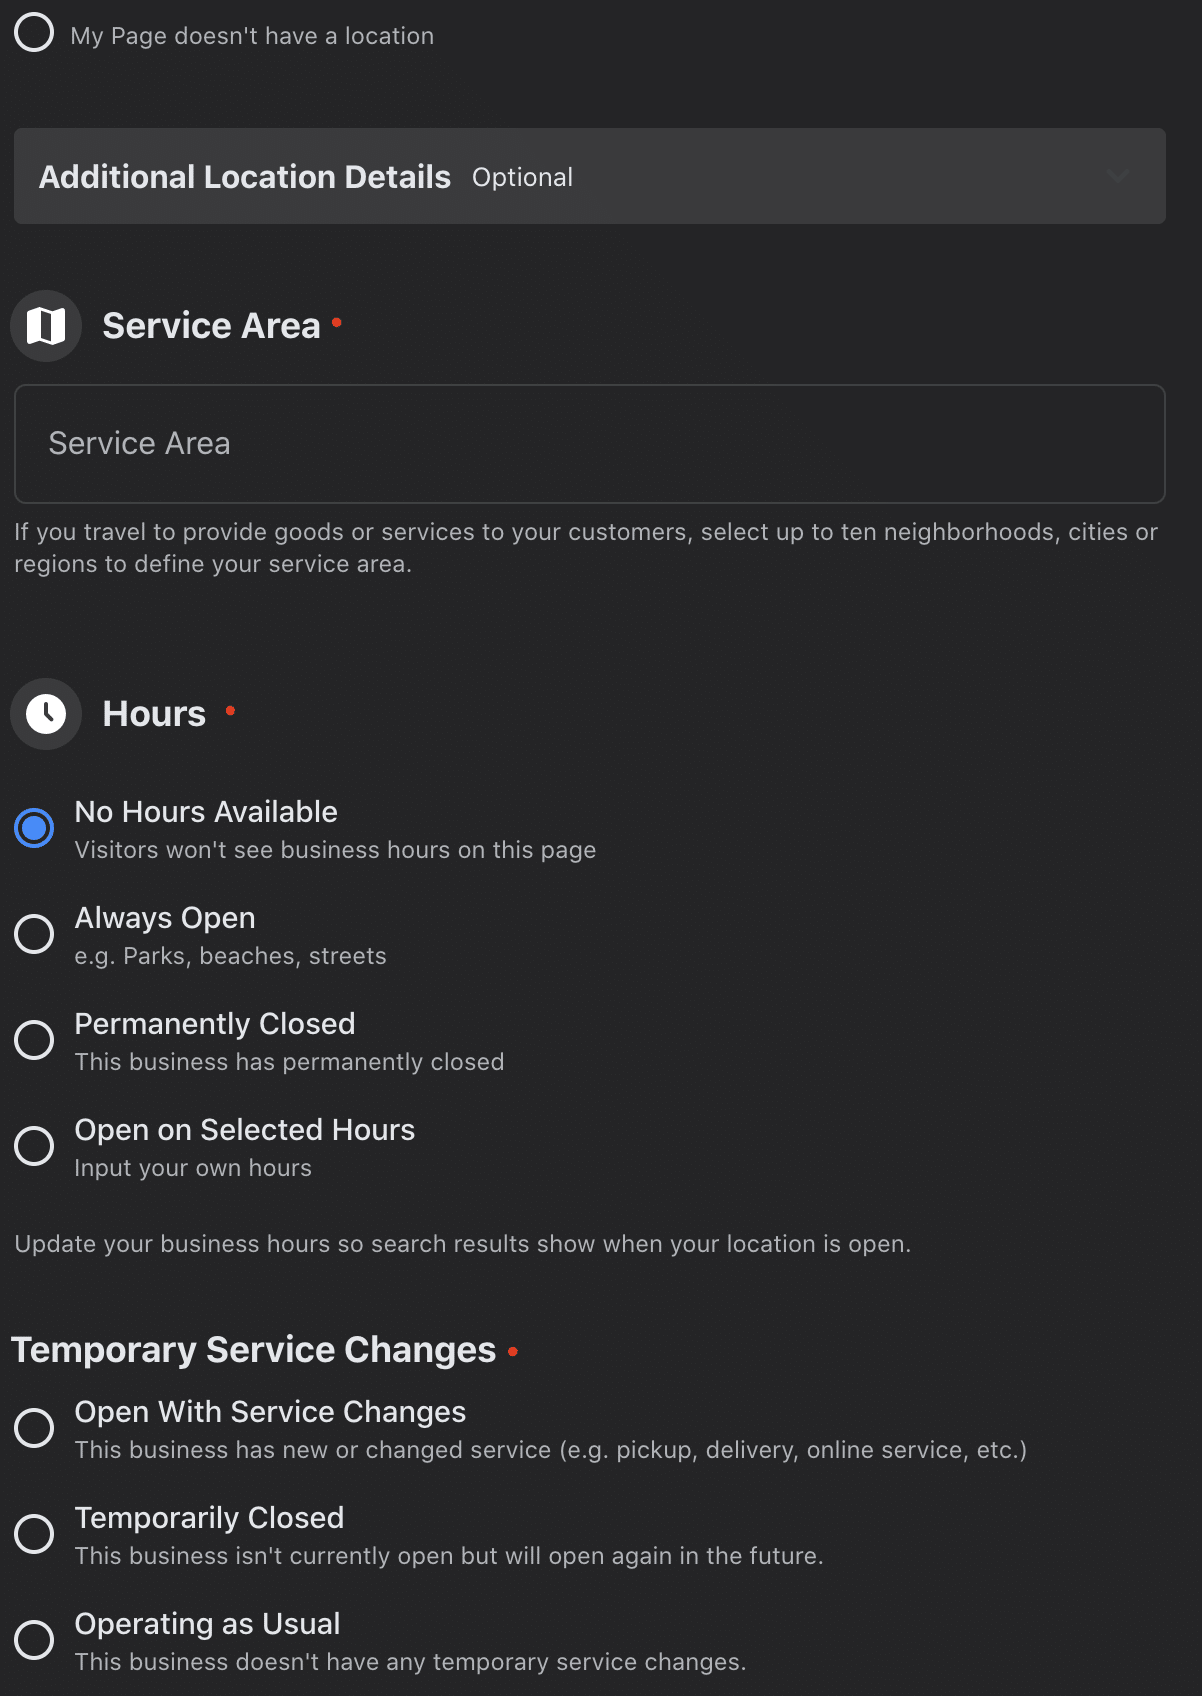
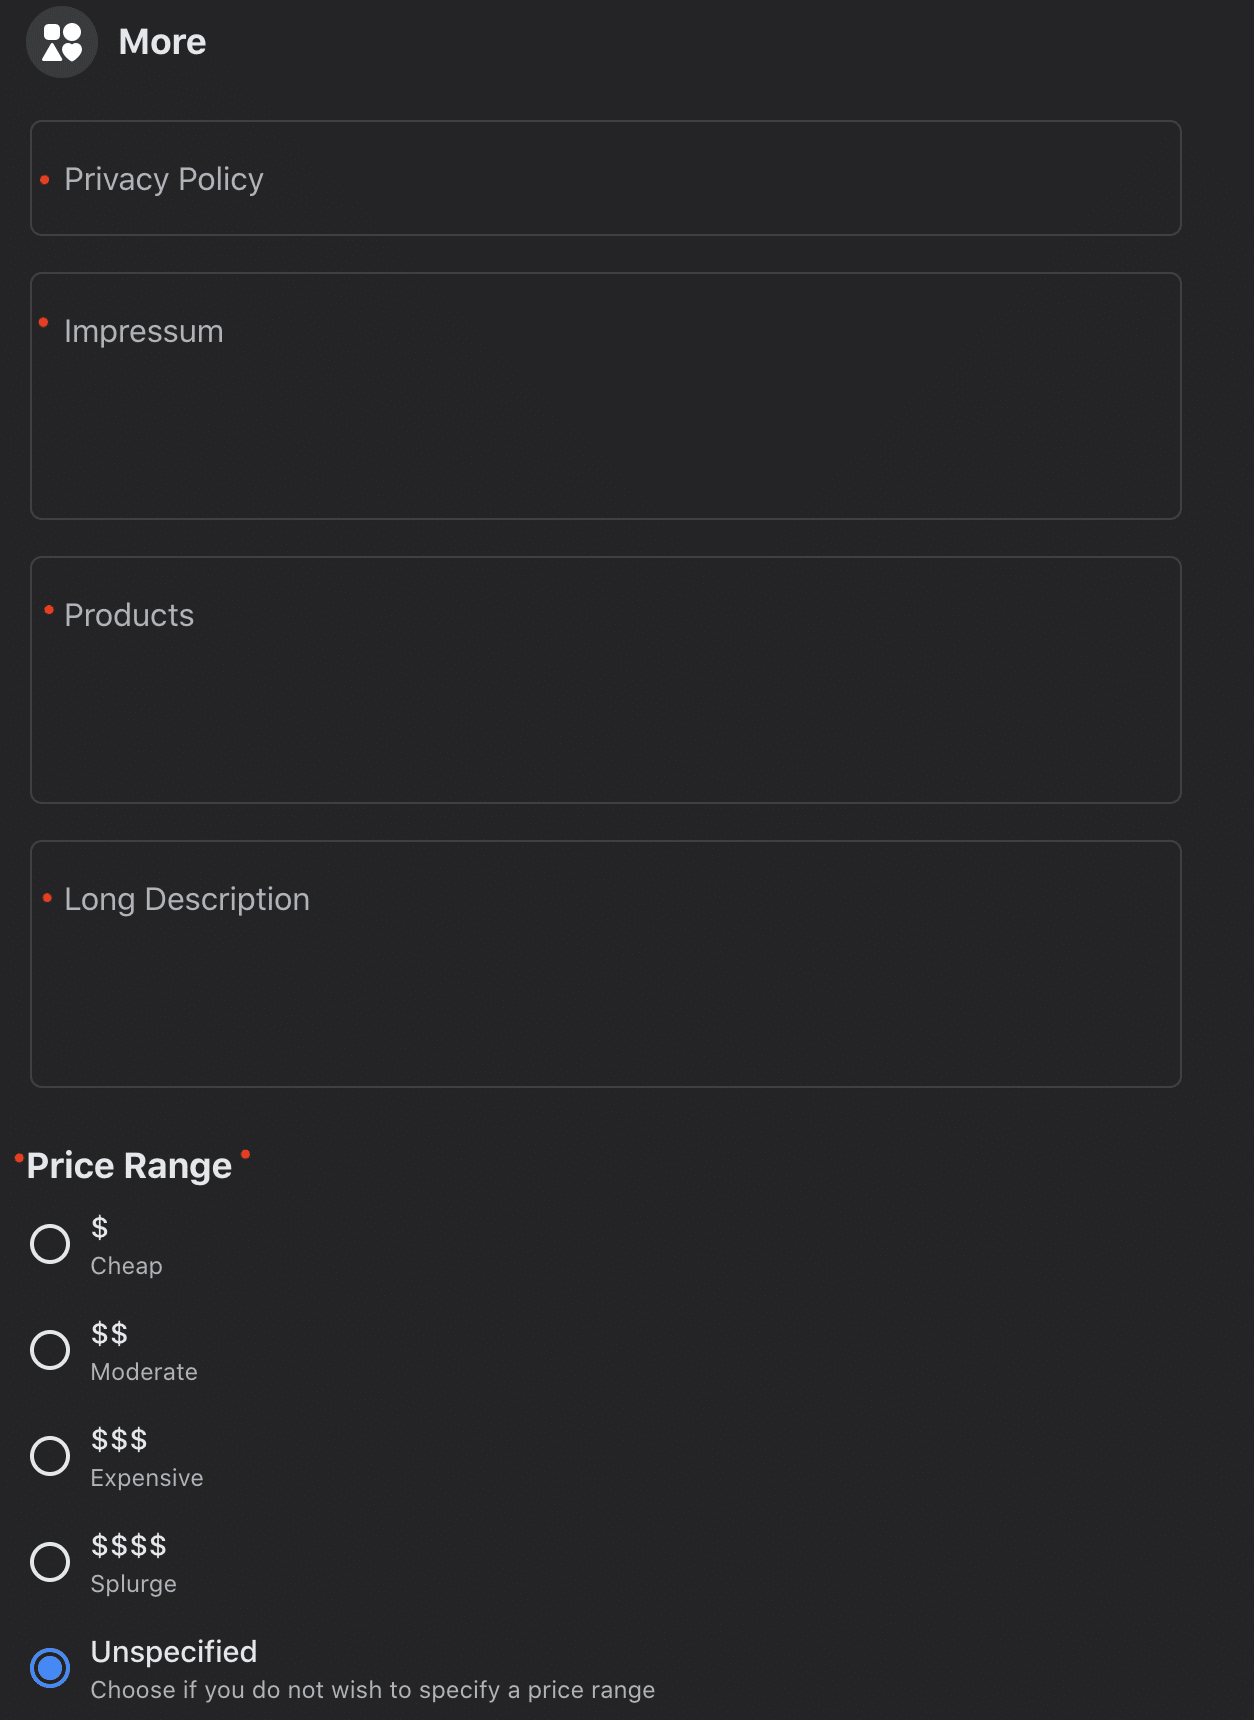
You can now see the area where you can fill out and edit your businesses information and page details such as:
- your name
- Username
- Description
- Categories
- Phone Number
- Email Address
- Website, Business Address
- Service Areas
- Business Hours
- Temporary Service Changes
- Privacy Policy
- Impressum
- Products
- Longer Description Area
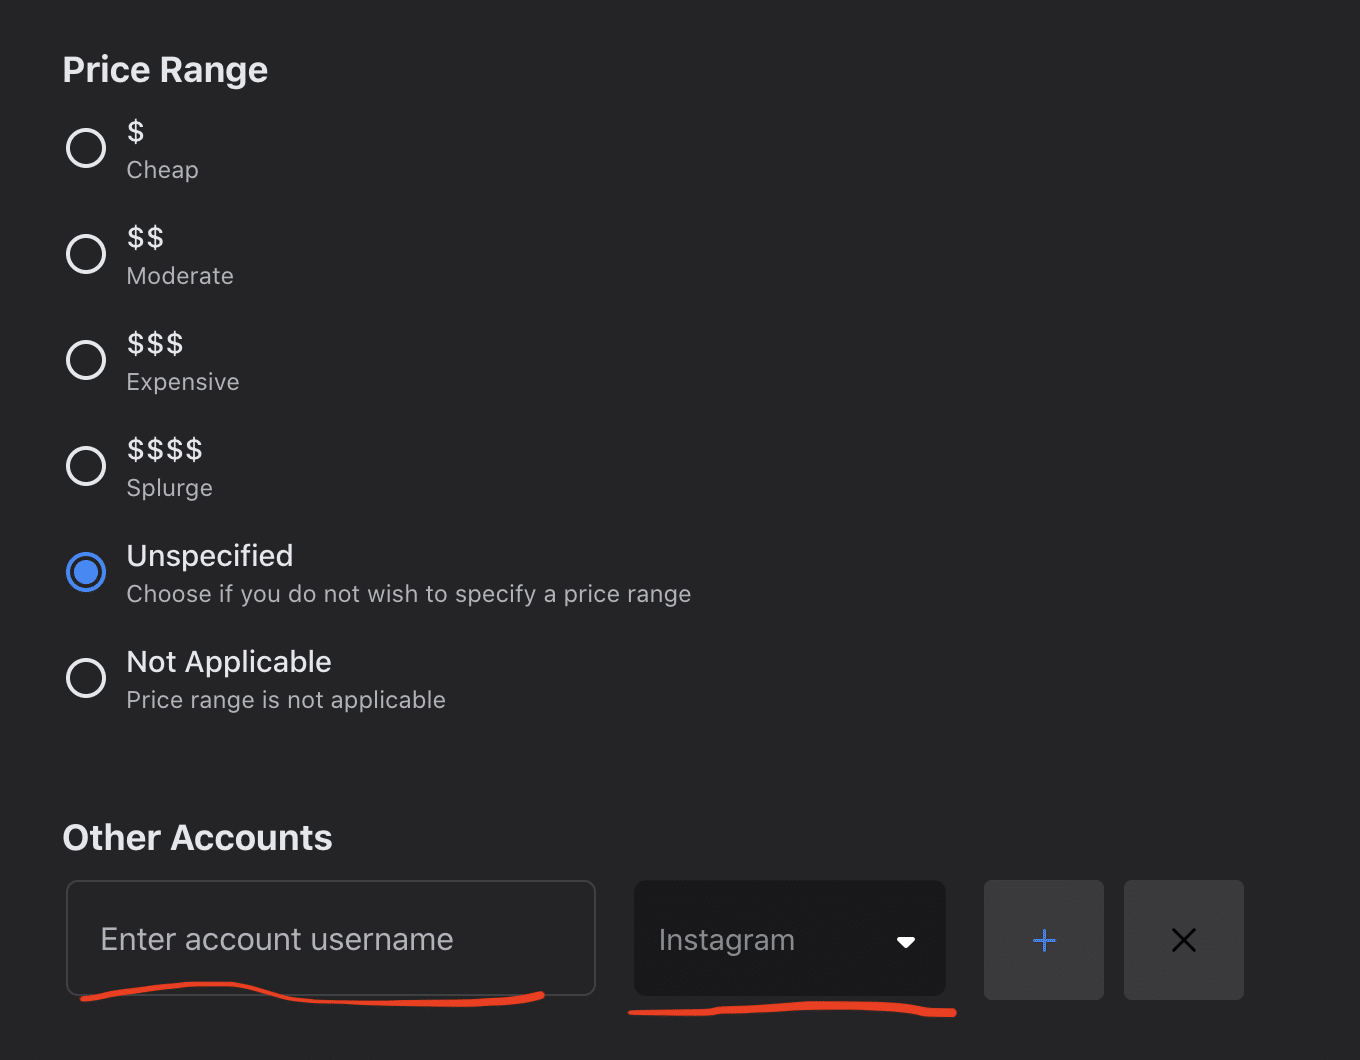
- A Price Range section if you would like to use it.
- And An Area To Connect other Social Accounts
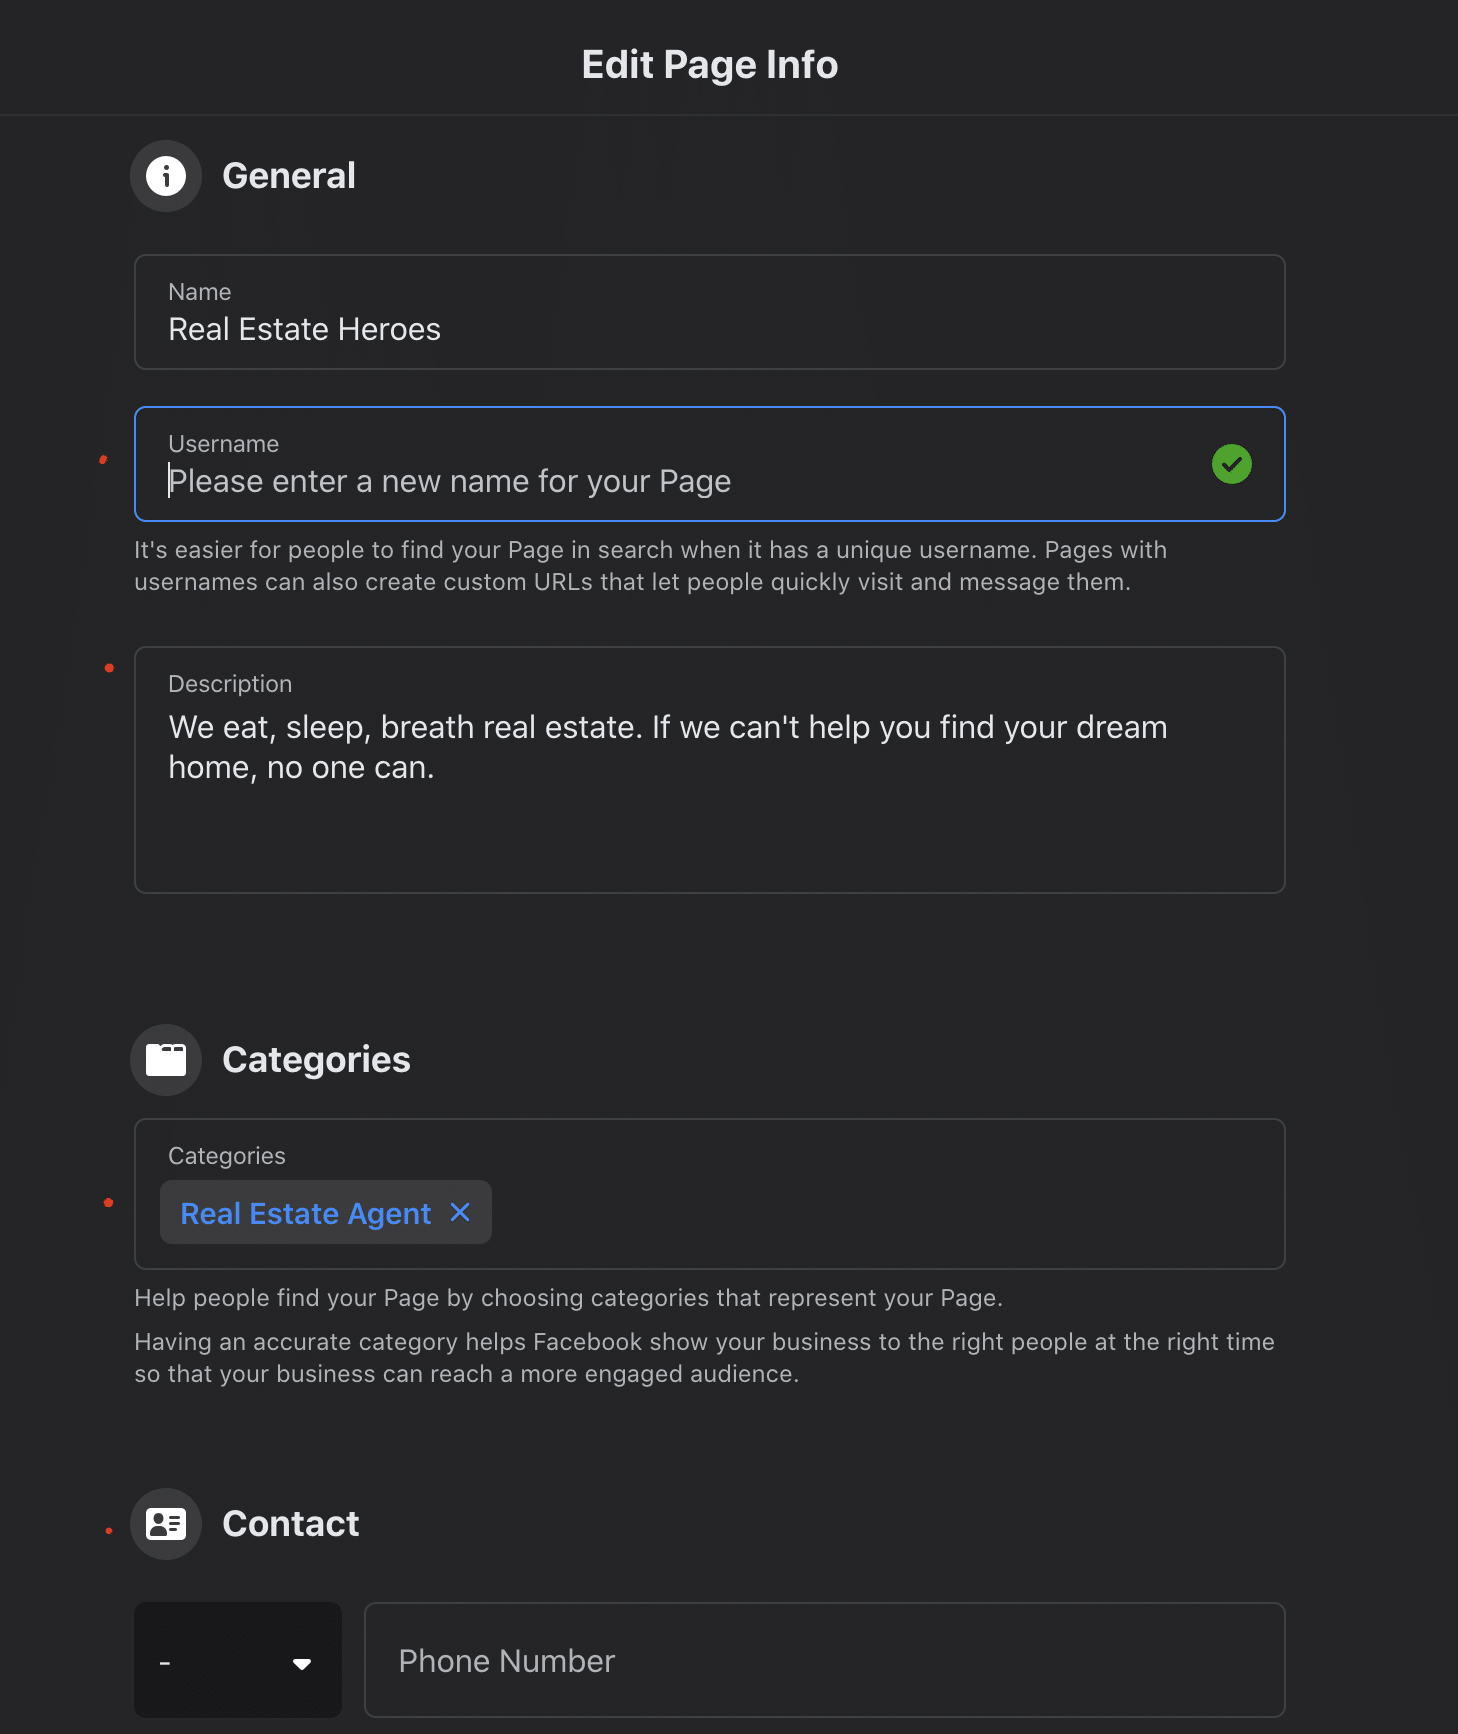
Once you fill everything out, click on the “settings” option in the same menu you clicked on previously.
Feel free to skim through all the settings available to you here if you would like to, but we are just going to be touching on a few things within page settings for this article.
First, I would like to point out the “Visitor Posts” section directly underneath the “Page Visibility” section.
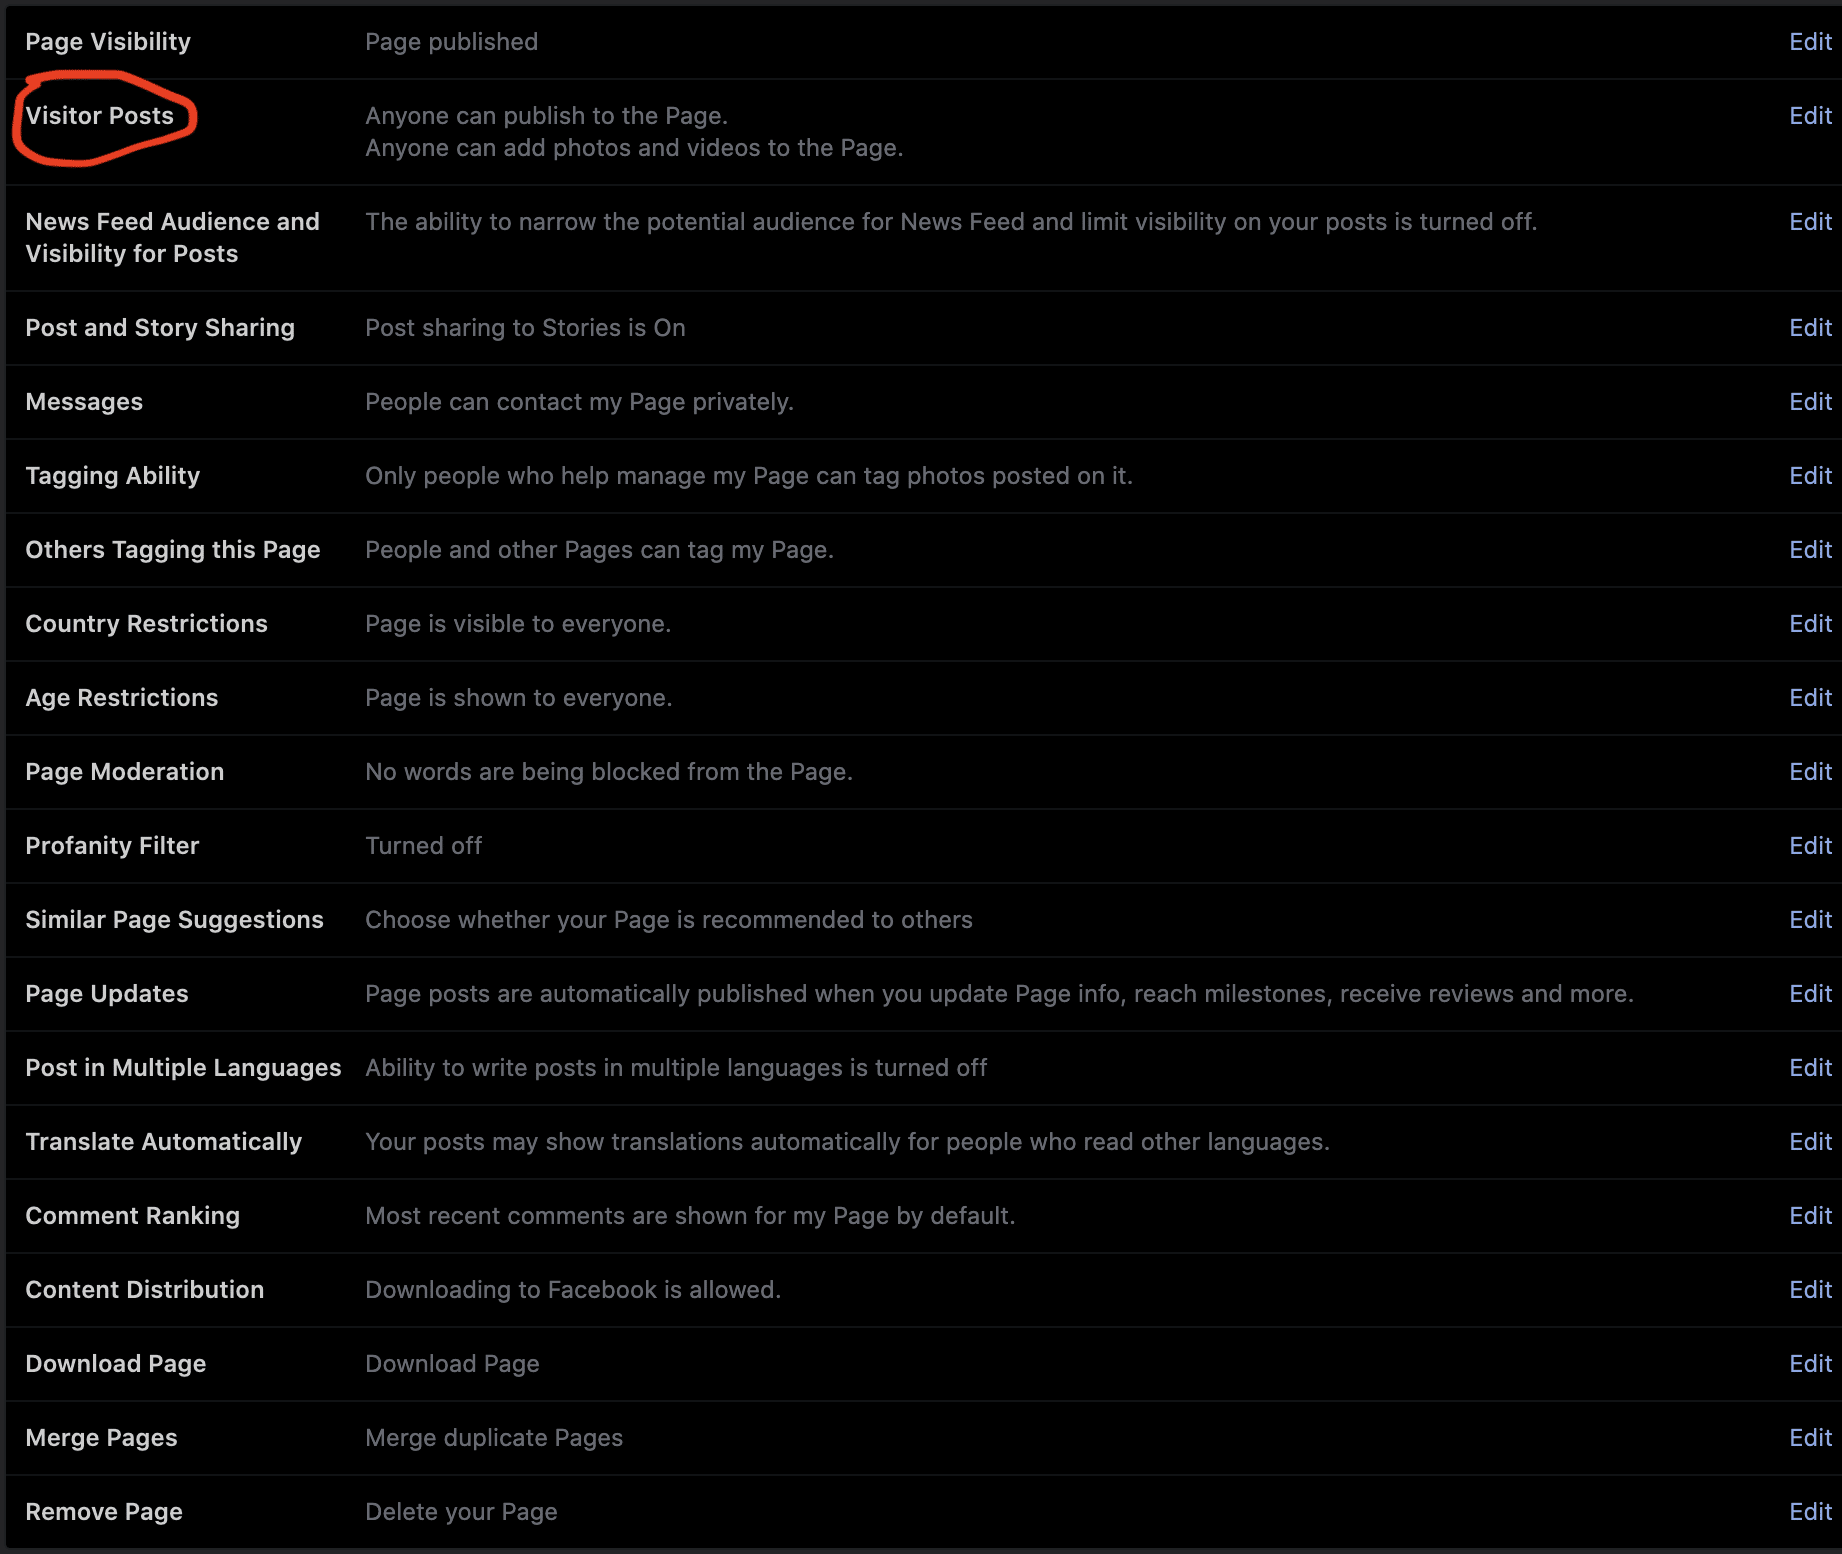
Right out of the gate, Facebook has the default setting as “allow visitors to the page to publish posts,” depending on how big your team is or if it is just yourself. Think about if this setting is okay with you or if you would like to change it.
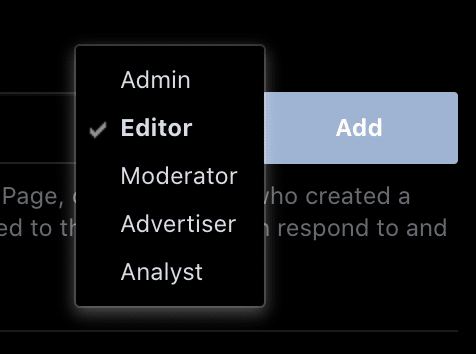
Suppose you have an employee acting in the role of admin, editor, or moderator that will be there to monitor what’s happening on your page. In that case, either have it the way it is or change it to “review posts by other people before they are published to the page.” Again, use your discretion here to decide based on how you would like to set up the page.


Moving on, Check out the menu on the left-hand side and click on “Page Roles.” If you have a team behind you, this is where you give them all access to the page based on their roles. (if it’s just you, for now, you can skip this)
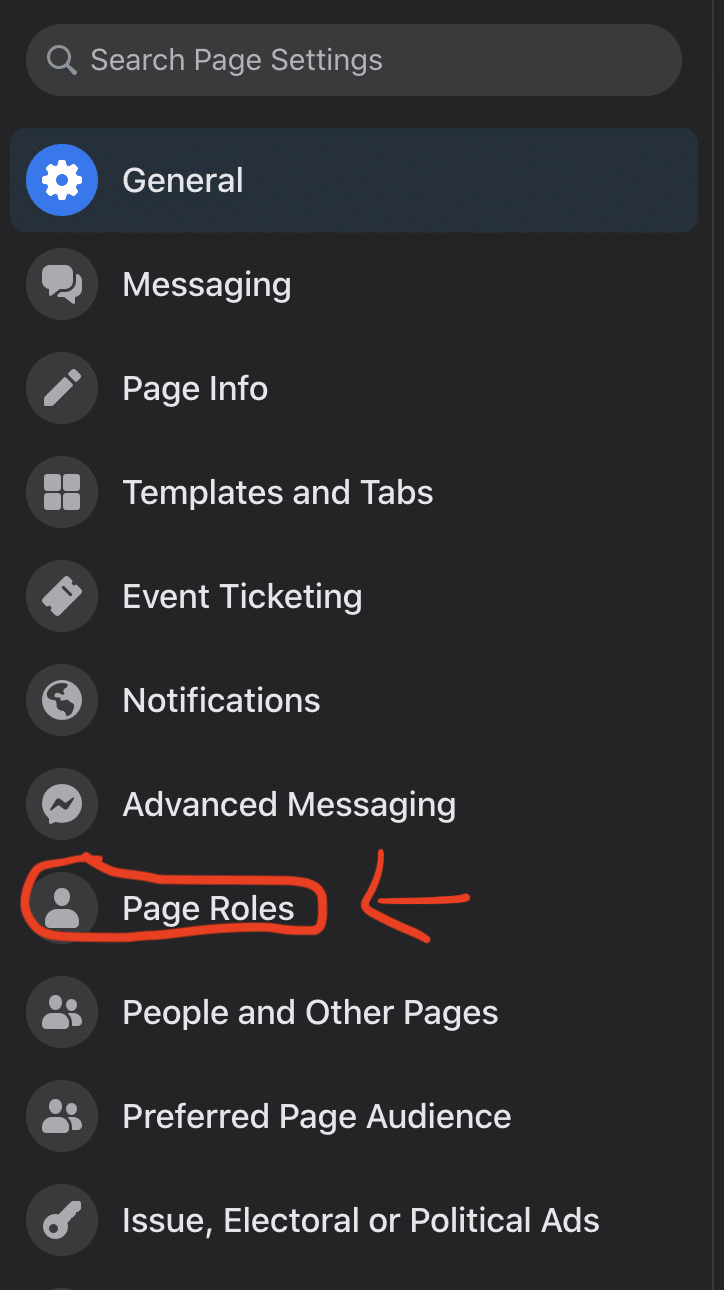

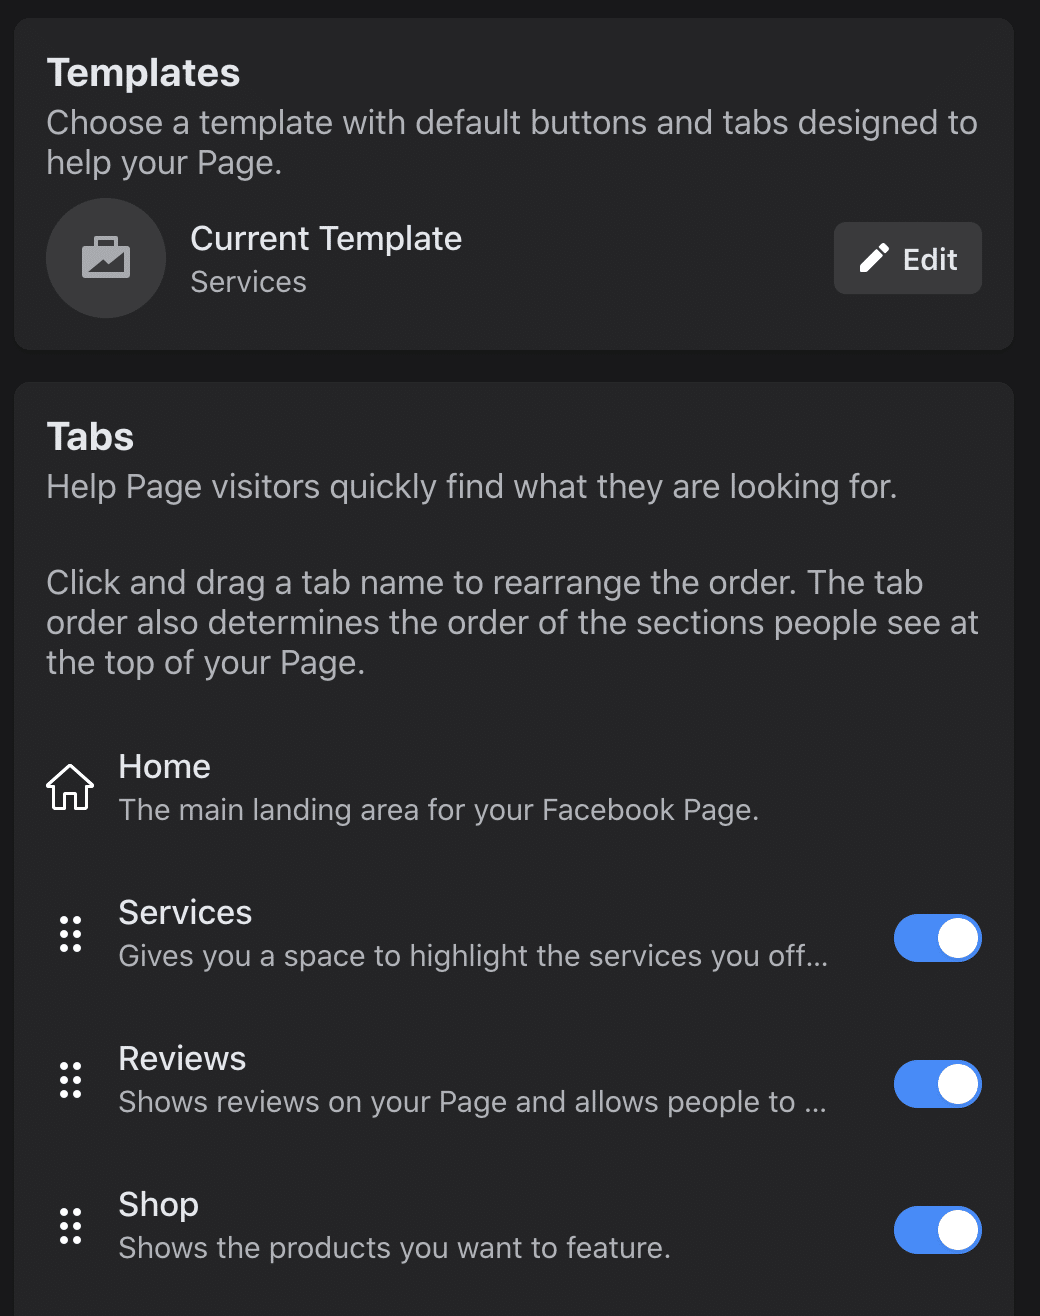
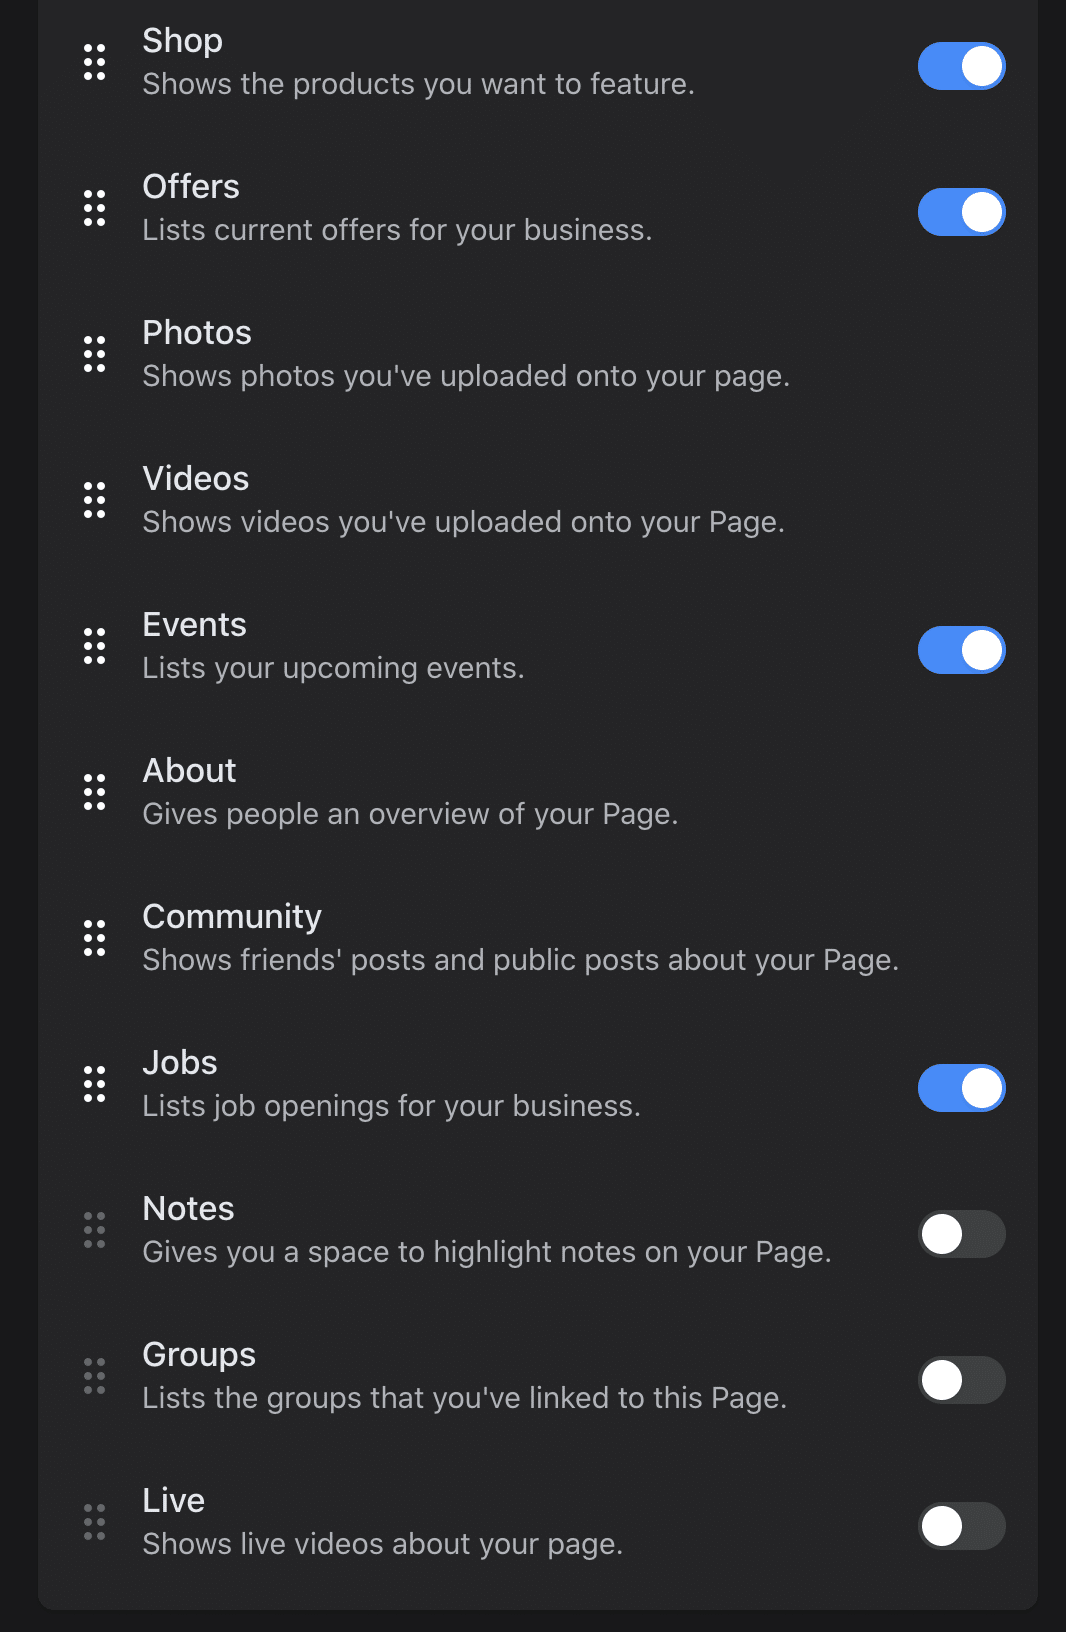
Next, click on “Templates and Tabs.” from here, you get to pick and choose which tabs you want to display on your page for others to see and navigate through. Another thing to note here is that you can order them, however, you believe it would be best for the user experience.
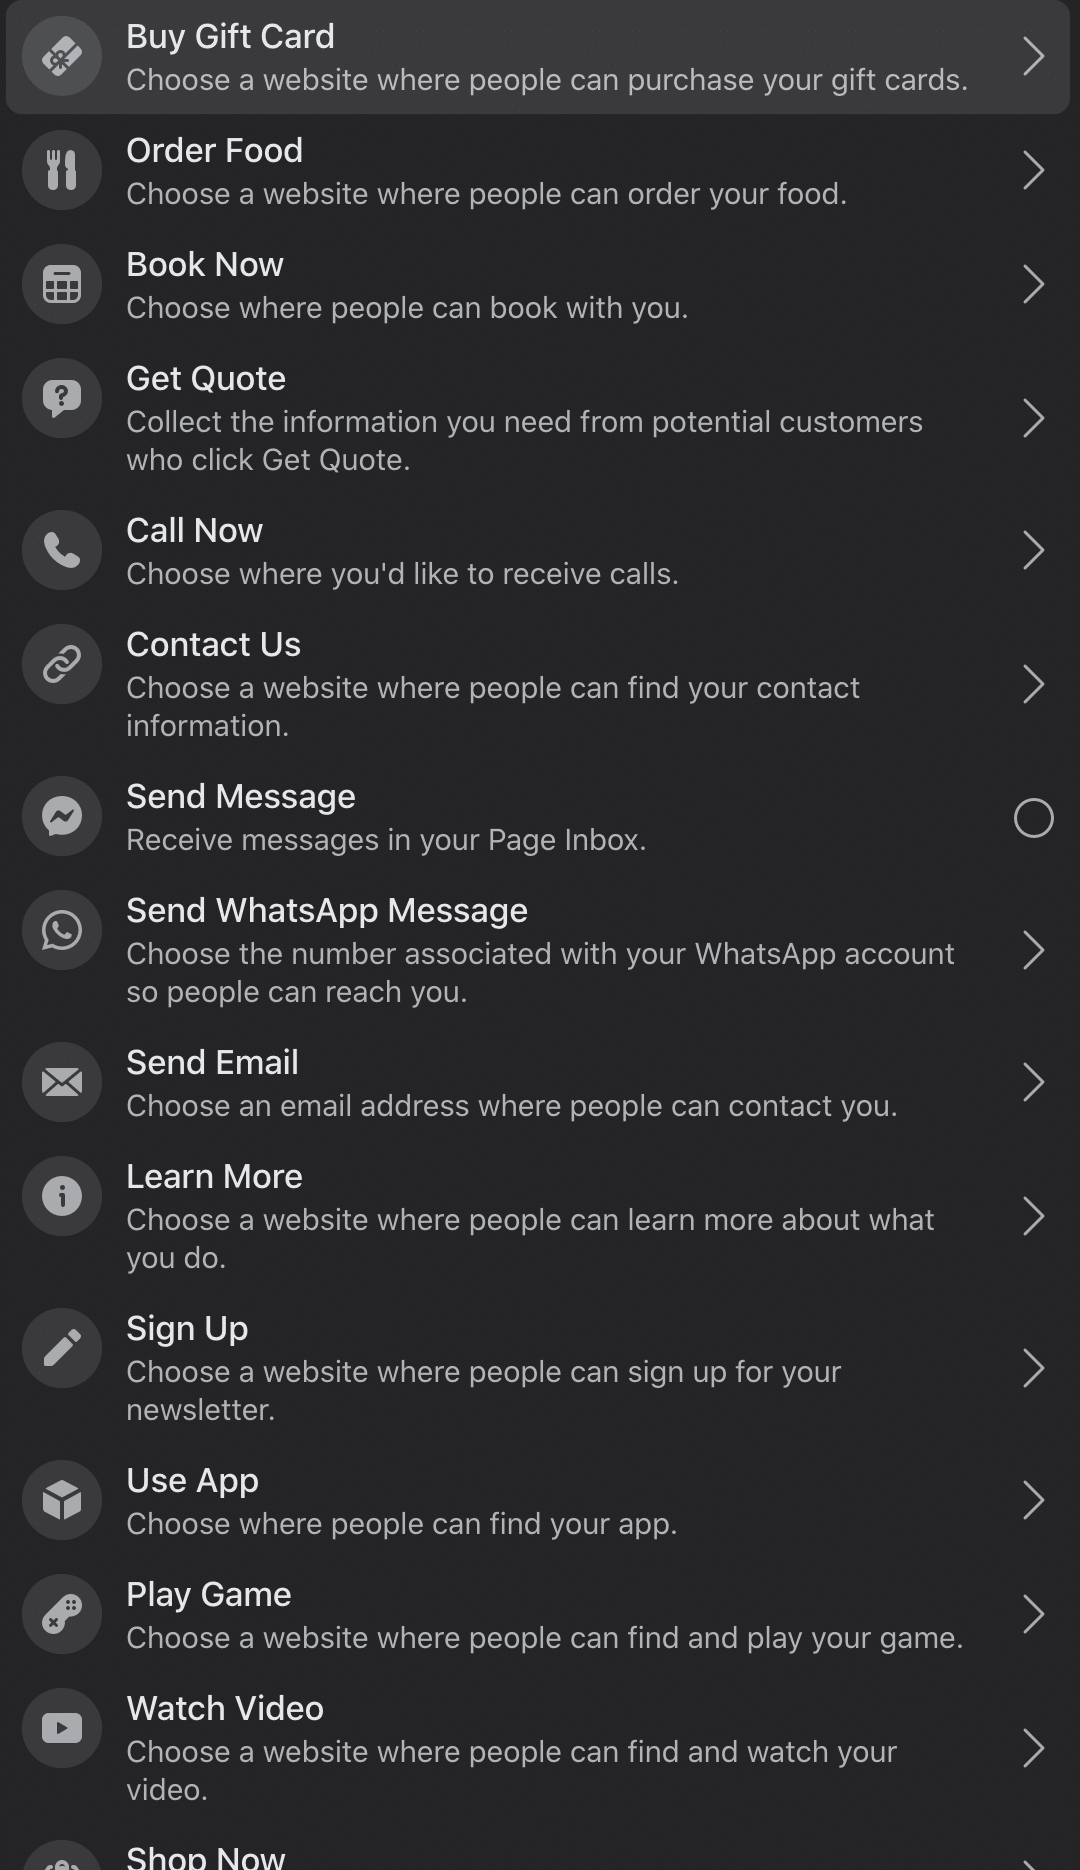
Next up – Setting up your call to action button.
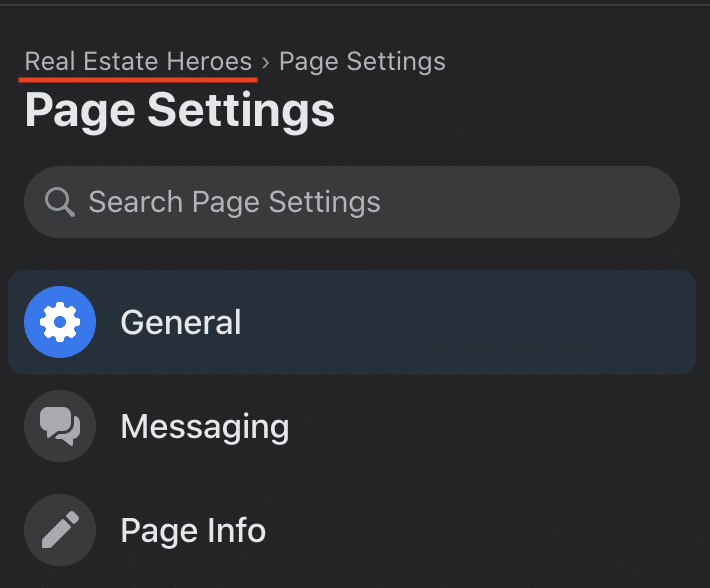
Return to your page’s home screen by clicking on your page name located in the top left of the page right above the search bar.
To the right of your profile picture, you will see a blue button that says, “+ Add a Button.” Click on this and select the CTA right for you.

NOTE: Please pick something that you can fulfill. If you select “Call Now,” make sure someone will pick up the phone. If you happen to choose something that you cannot perform, you will wind up driving people who are trying to do business with you away quickly, and there is not usually a second chance.
Congratulations!
If you have followed this setup guide entirely, you are now sitting in a pretty great spot with a Facebook business page that should be set up, ready for your first followers!
What To Post On Facebook

Posting the right content is more important than you think. If you are always pitching new listings without trying to add value, you will drive people away in flocks.
Social media is all about providing huge value upfront and building relationships over time. Here are some examples of what you could post:
- Posting pictures with clients
- Video Walkthroughs
- House restoration progress pictures
- Ebook on house flipping
- Guides to getting the best deal for a first
- Tips on getting everything you want in a home
- Facebook lives teaching all the real estate options out there as a buyer.
- Guides to all the great local places to eat at
- Share blog posts from your website
- Share blog posts from other websites that you think your fans might find interesting.
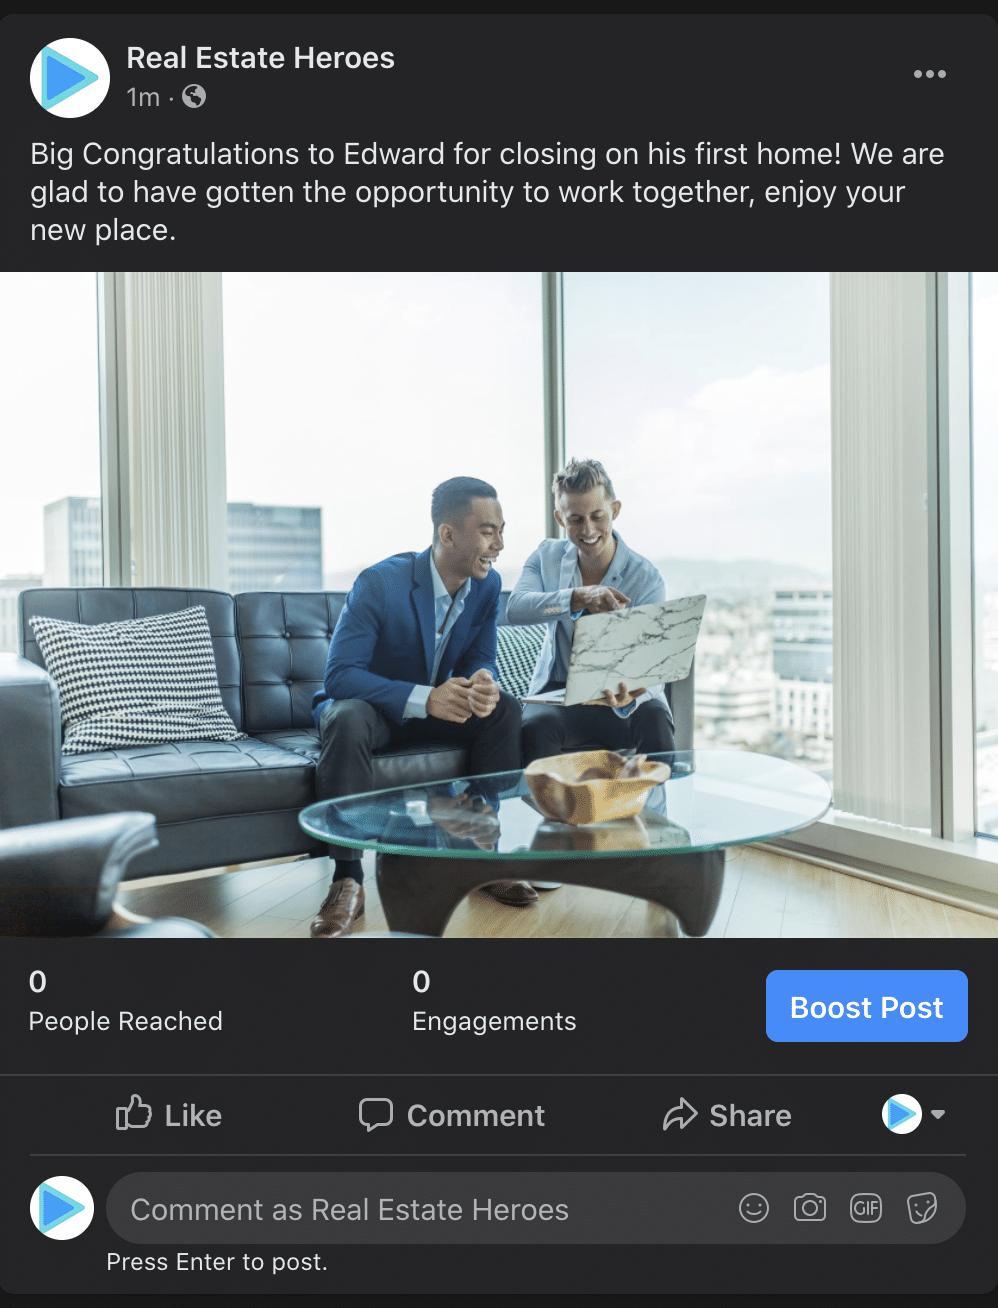
Take these ideas and think about how you can add value in your unique way. The better experience you can provide for the people who like your page, the more likely they will remember you when they are ready to buy.
When To Post On Facebook

As I mentioned above, being aware of posting the right things at the right time is essential.
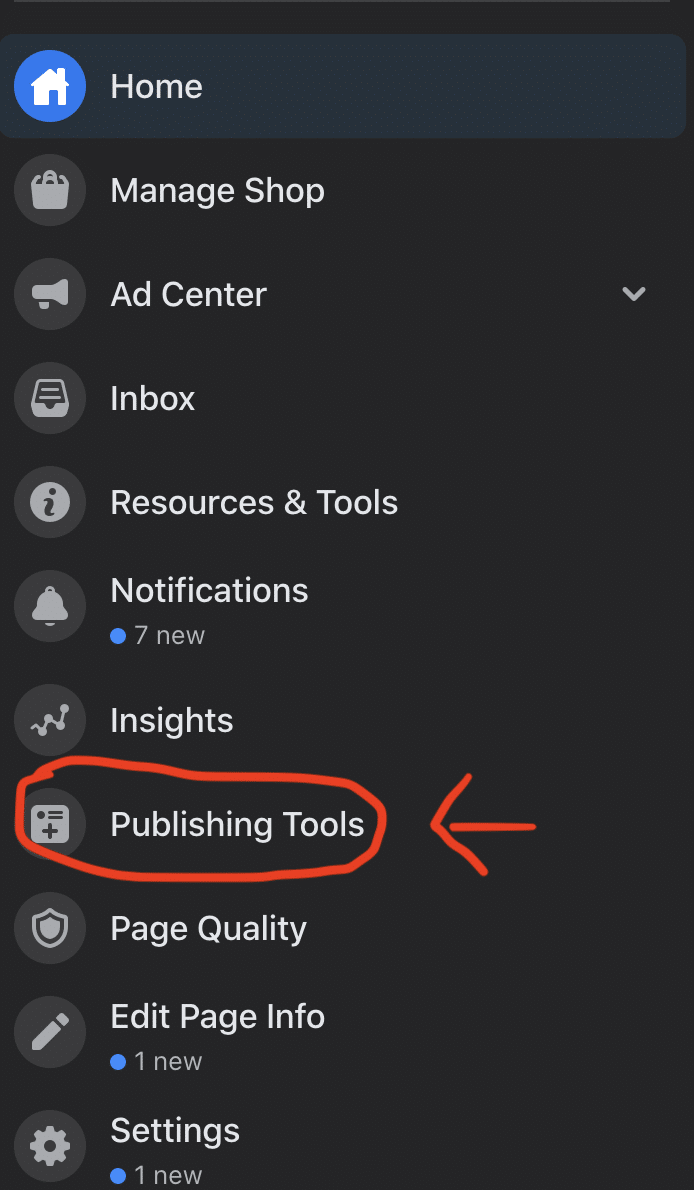
You can schedule posts for whenever you would like on your page. To access and use this tool, all you have to do is click on the “Publishing Tools” tab.
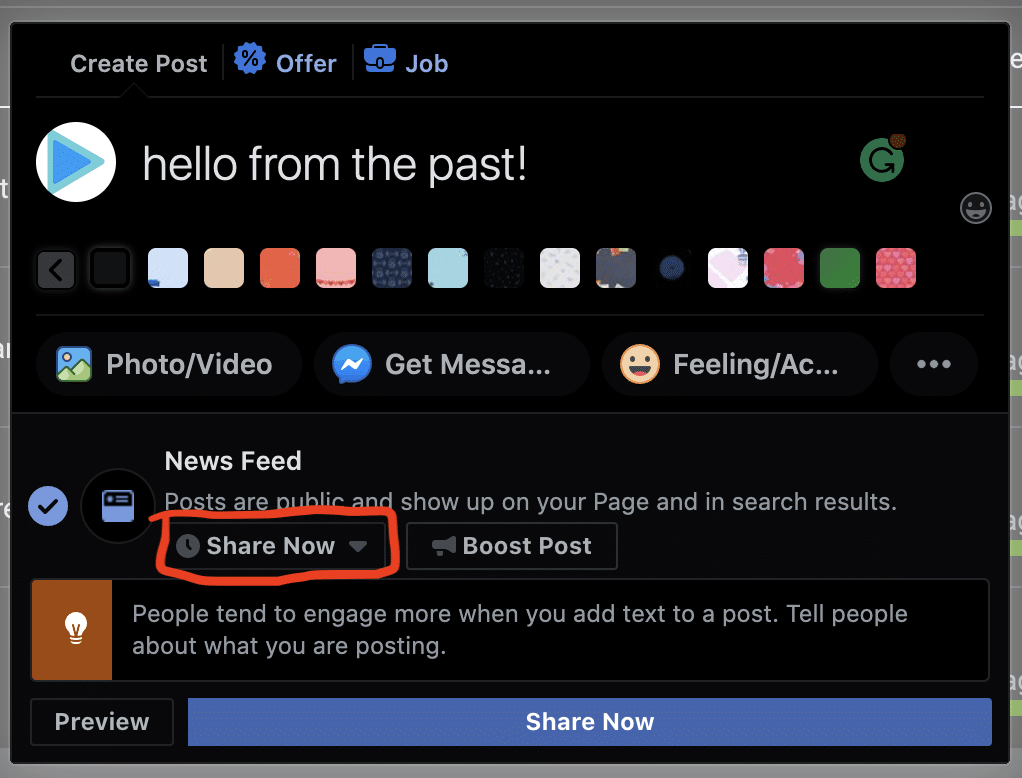
Next, click the “Create Post” button underneath the search bar. Then you want to click on the little box that says, “Share Now” A drop-down menu will appear where you can then select “Schedule”. From here, you can schedule a post you desire for a later date of your choosing.

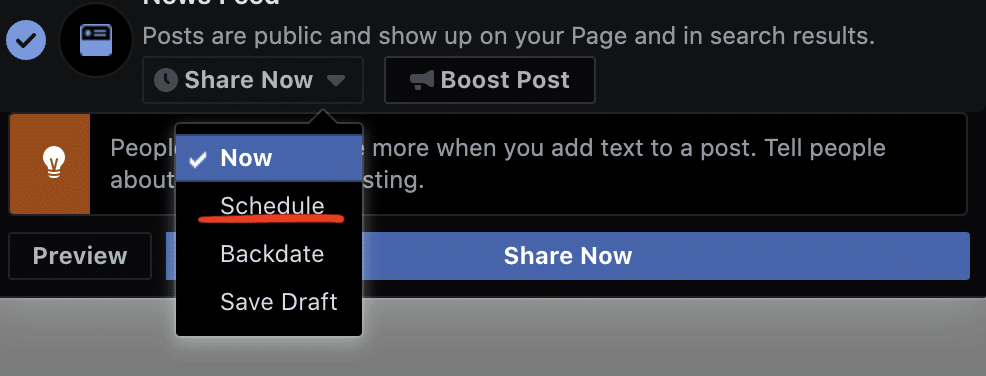
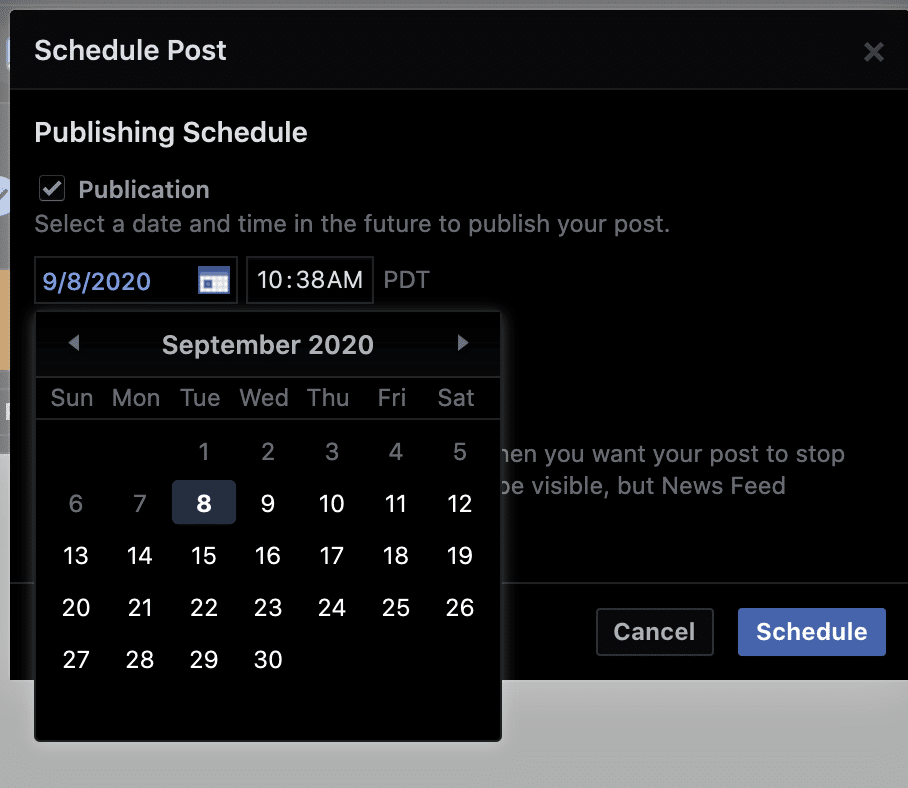
Now that you now know how to schedule your posts, you might want to know when the best time to post is right?
According to Buffer’s study, the best times to post are 1-3 PM during the week and on Saturdays.
However, these times aren’t always the best case for you and your audience. Experiment a little to see when you have the best interactions with your posts. Don’t worry about the time too much at first when you are starting. The most important thing you can do is start posting content, so when people find your page, they will be able to dive right in.
When you have a decent following though, and would like to see your page insights to make an educated decision for when you should post, here is what you need to do: Click on the “Insights” tab in the navigation bar on the left-hand side of the screen.
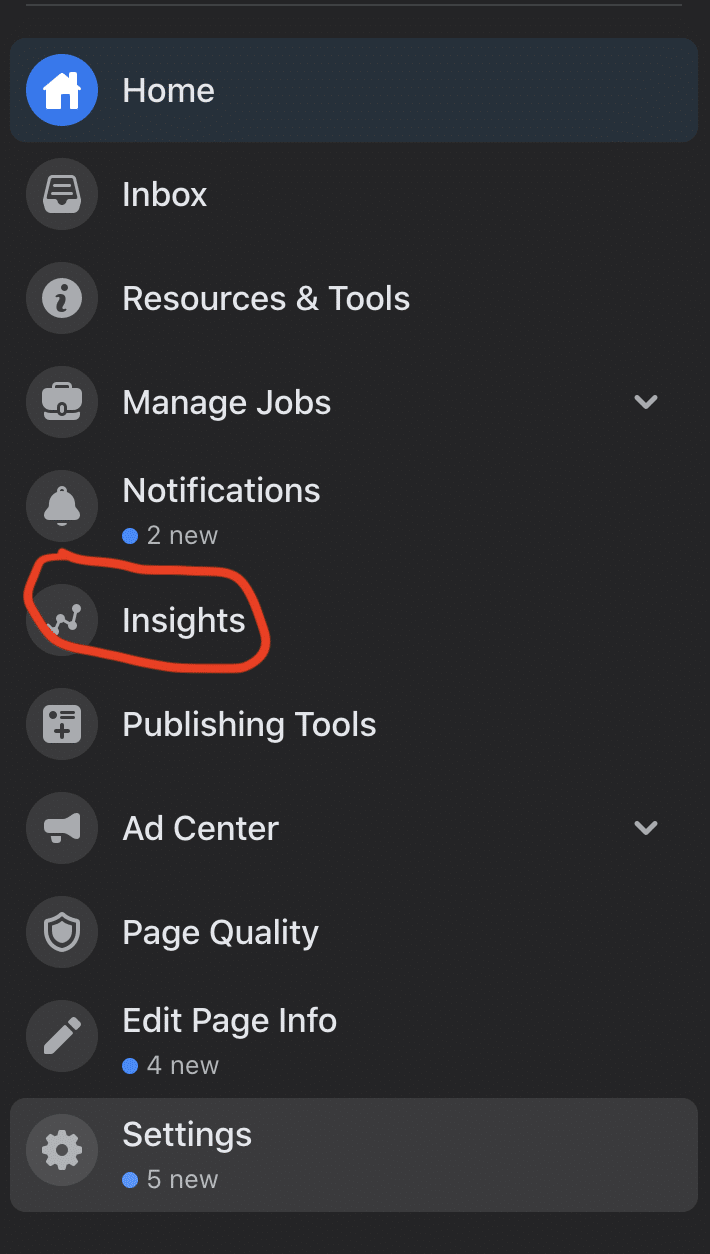
On this page, you will find many pools of information that you could use, but if you would like to see how a particular post is doing, all you need to do is scroll down to the post section and click on the one you would like insights. Check the ones that did well and see what time was, then document what seems to be working and create your posting schedule around that.
Where To Find And Create Incredible Visuals For Free

Having great images and interactive content is important when it comes to Facebook marketing for real estate, luckily for you, creating visually engaging content doesn’t need to be complicated or expensive.
There are other resources out there for high-quality royalty-free images; however, I am only going to mention the two that I use daily and love: Pixabay and Unsplash.
When it comes to creating or editing those great images, check out Canva. Don’t worry; it’s also free for the most part unless you would like to upgrade, then it is a monthly subscription of $12, but this isn’t necessary at all, and you can use most of the features for free.

Image Source: Canva.com
How To Use Facebook Groups In Your Real Estate Marketing Plan

How to find them
The process of finding groups is pretty simple. First, click on the group tab in the top navigation bar.

Once you are in the groups’ tab, click on the top left corner’s search box.
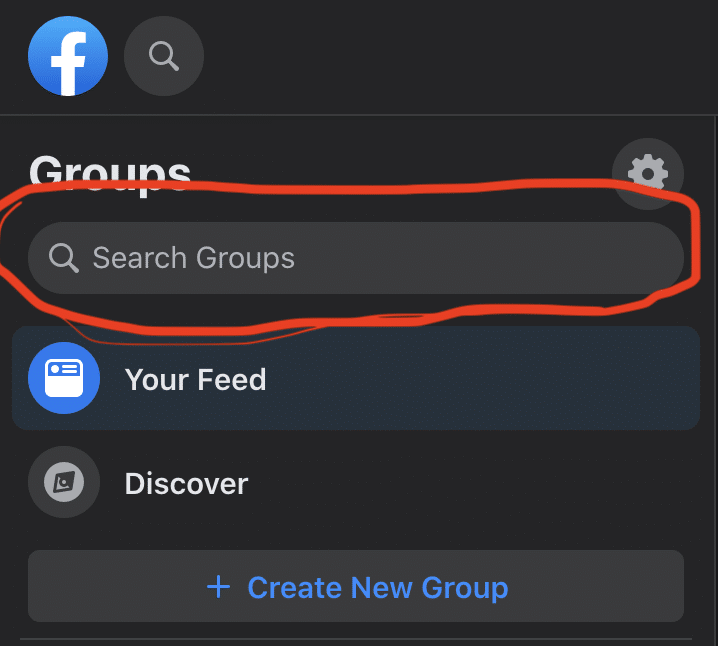
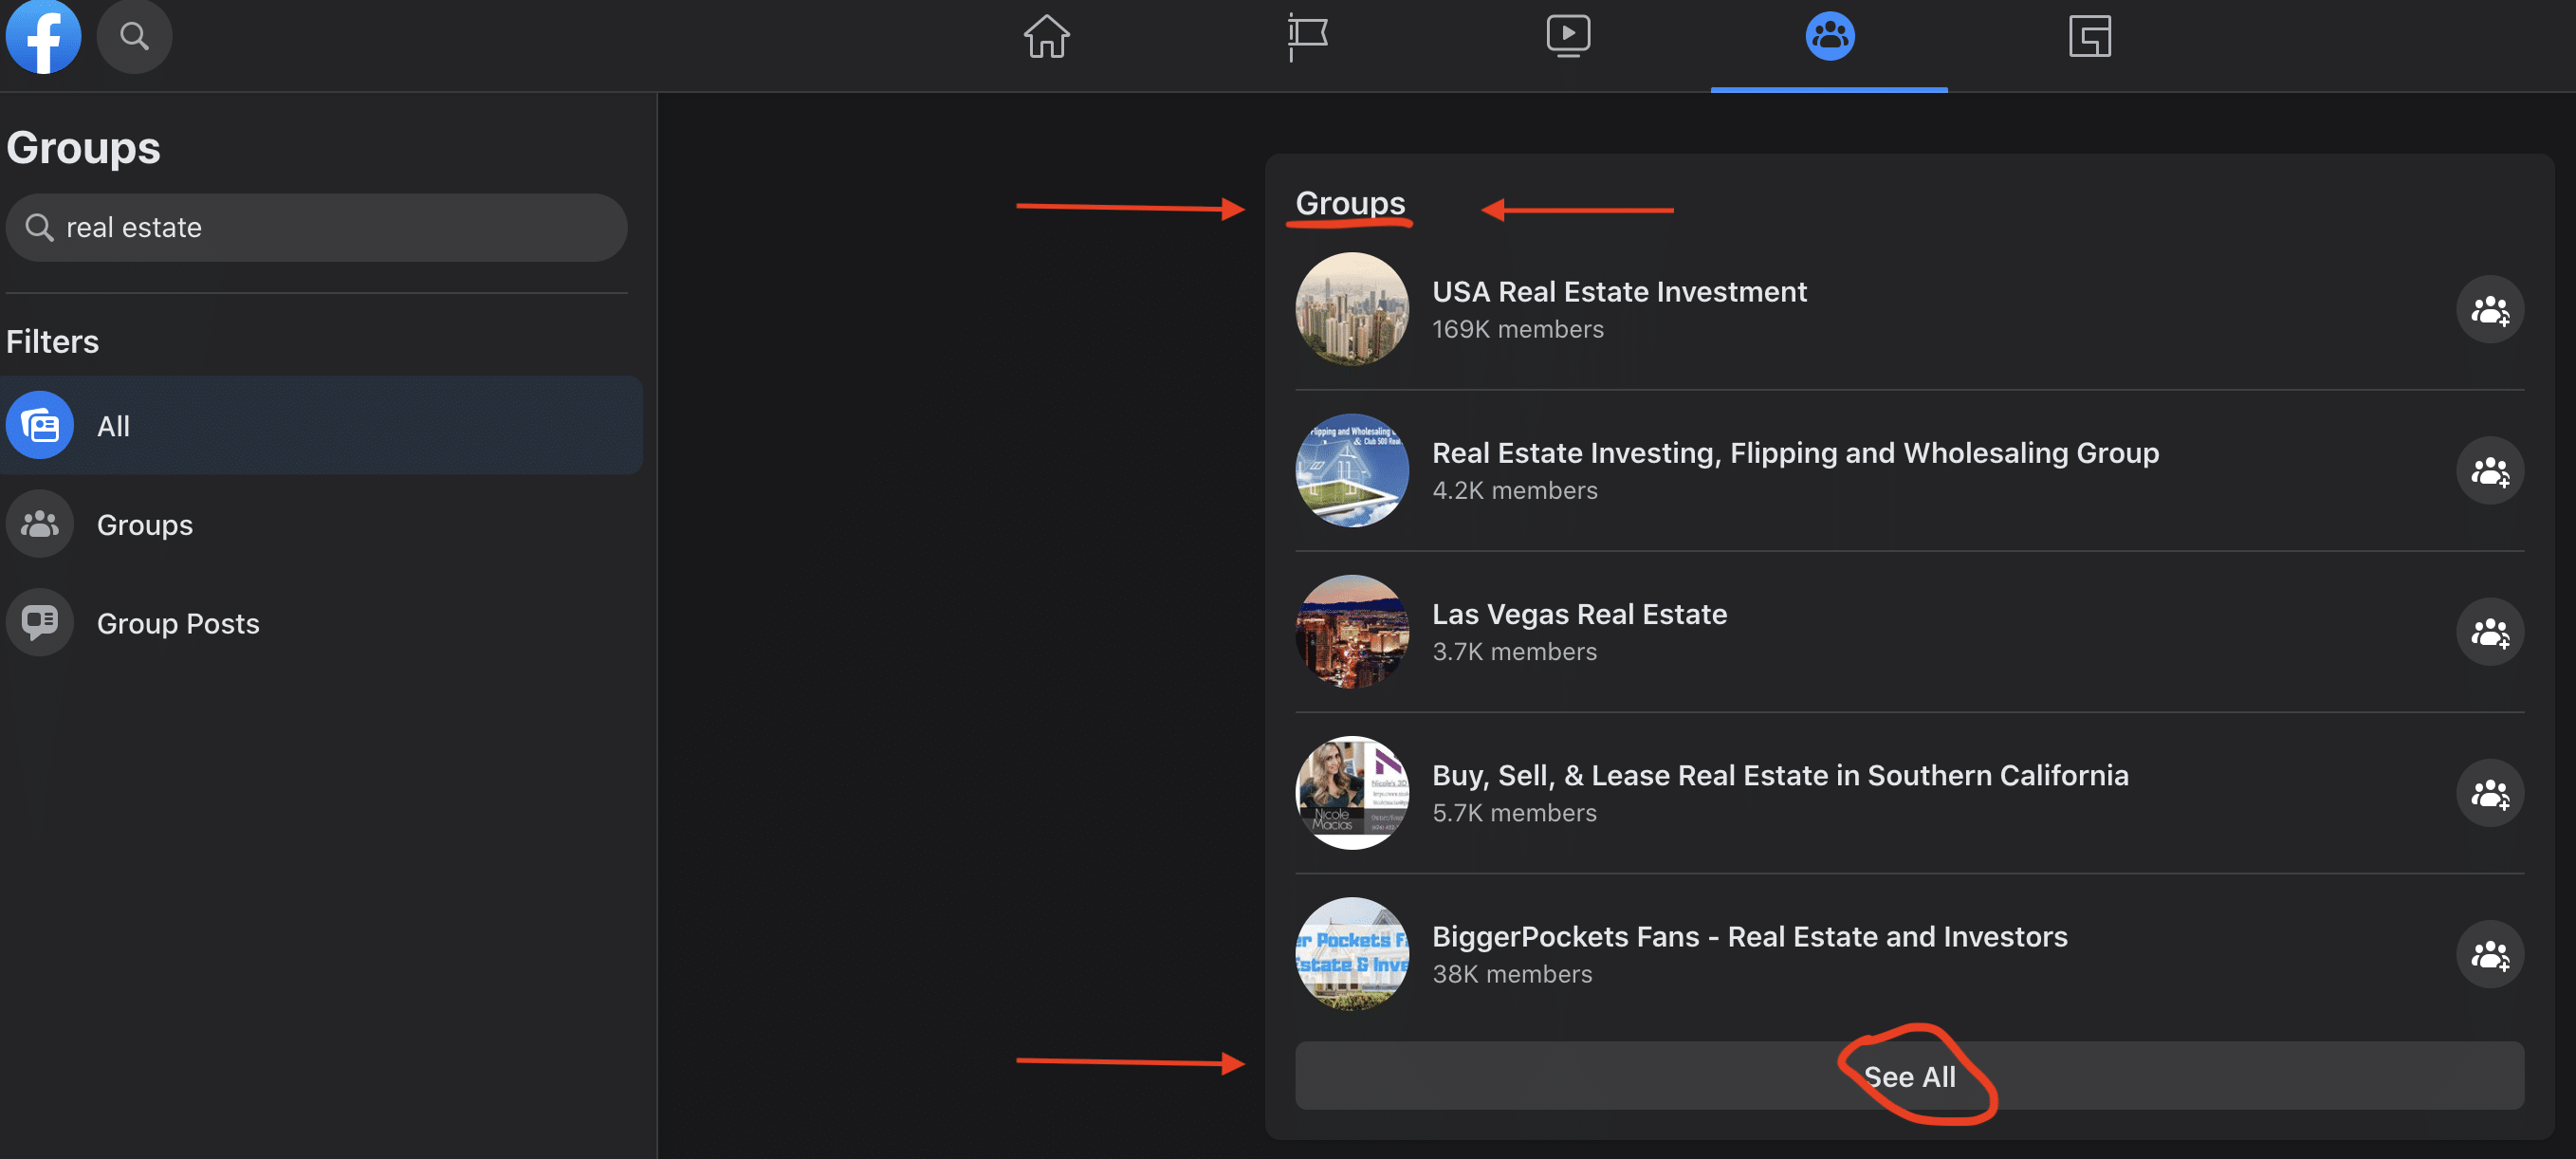
You can search up pretty much anything, and there will most likely be a group there for you to join. I recommend that you try to start with joining groups that talk about things you already have an interest in besides real estate located in your local area. For example, if you are passionate about classic cars, you should join a classic car group and make meaningful relationships.
Take a moment to think about the other interests you have outside of real estate and apply them when searching for groups you can join.
How To Add Value In Facebook Groups And Make A Lasting Impression
Let’s cut to the point with this one. Everyone loves talking about themselves and their interests.
You can leave a lasting impression on others by focusing on them and what they love.
Using the above example, classic car owners love to show off all their hard work and talk about it. Maybe you could create a meetup event where people get to pop open their hoods and display it for the world.
The meet and greet would be an excellent opportunity for you to connect with new people and start building relationships. Not everyone will want to do business, but if you focus on creating the relationship, more people will turn to you for their real estate needs.
What Not To Do In Your Facebook Groups
Don’t spam. Don’t be a robot. Don’t always make it about you. Don’t disregard group rules.
These are just stuff to keep in mind when trying to get involved with groups. A lot of the time, page owners will eventually kick you out if you ruin others’ experiences within the group.
Take the time to browse up on the rules of the groups you join and stay within those parameters. If you get caught spamming or breaking any other group rules, you will most likely be kicked out.
When you comment on other people’s posts in the group, think of it as if you are talking to a real person (because you are). No one likes talking with an emotionless robot.
You will have better results when you act like yourself and connect with others personally.
Your Facebook Real Estate Marketing Strategy

It’s better to have a plan than winging it on hope when it comes to obtaining results. Do you have your Facebook marketing strategy down? Or are you just putting whatever you can out there in hopes that it will develop into something of value for you?
If you are in boat number 2, keep reading because this section is for you.
Here are some questions that you should spend some time on when making your plan:
Who is your audience?
- Who are the people you want to speak with?
- What age are they?
- Where do they live?
- What are their hobbies?
- What is their annual income?
- Are they single or married?
- Do they have kids?
- Are they animal lovers?
- Do they love to travel?
- Are they sports fans?
- What do they look like?
You want to understand your audience inside and out. Be as detailed as possible! If you know whom you are talking to, it makes it very easy to get your message in front of the right people.
The right content in front of the right people could very well start new relationships that could eventually turn into a potential buyer.
Where is your audience?
- What groups are they in?
- What pages do they follow?
If you know what your ideal customer loves to do or talk about, you have your starting point for the way you should go.
Join a few groups that are in the same general niche. It will broaden your reach and allow you to get your name in front of people when you become more active.
When are you going to post?
- When are your clients most active on Facebook?
As I said above, the best general time to post is 1-3 PM weekdays and Saturday. After you have enough interaction on your page, you will see what time is best with your audience.
What are you going to post?
- Are you going to post a video?
- Are you going to share a blog post you wrote?
- Are you going to create an infographic to share?
Having a content plan for what you are going to post, and when you are going to be doing it will help you stay ahead and give you a little peace of mind knowing what is coming next.
What is your competition doing?
- Is their page growing?
- What kind of content are they posting?
- Can you implement some of the things they are doing?
You can learn by looking at your competition and thinking about how you can do a variation of what they are doing.
Keep in mind that copying isn’t the way to go here. Please don’t copy what they are doing. Instead, take some of the things they are doing that look successful and put your unique spin on it. Use what’s working for them as inspiration for your genius.
Conclusion
- Having your Facebook business page set up and filled correctly makes your stand out as an expert in your field
- Always add value first to the people who like your page and the groups you join
- Get creative about finding ways to add value
- Joining Facebook groups and connecting with new people can be very beneficial
- Understand who your audience is
- Understand where your audience is and what groups they are in
- Make a plan for the content you post/when you post
If you want to read about more tips and ideas you can implement into your Facebook marketing for real estate strategy, check out our other awesome article –
10 Simple & Effective Real Estate Marketing Ideas
Facebook marketing for real estate doesn’t need to be a pain in the butt. If you set your page up correctly, add value first for your page, and the groups you join, your pipeline will begin to fill up regularly.
Thanks for sticking with me through this, and I hope you can take some value from it and someone you know.
It’s tough to maintain your marketing efforts and balance everything else in your business, but we are here for you if you need it.
If you would like help with your real estate marketing efforts, click on the button below to see the services we offer for your particular industry.





0 Comments